# Communication
# Sending a Prepared Message
To send a prepared message, click the EQ icon.
![]()
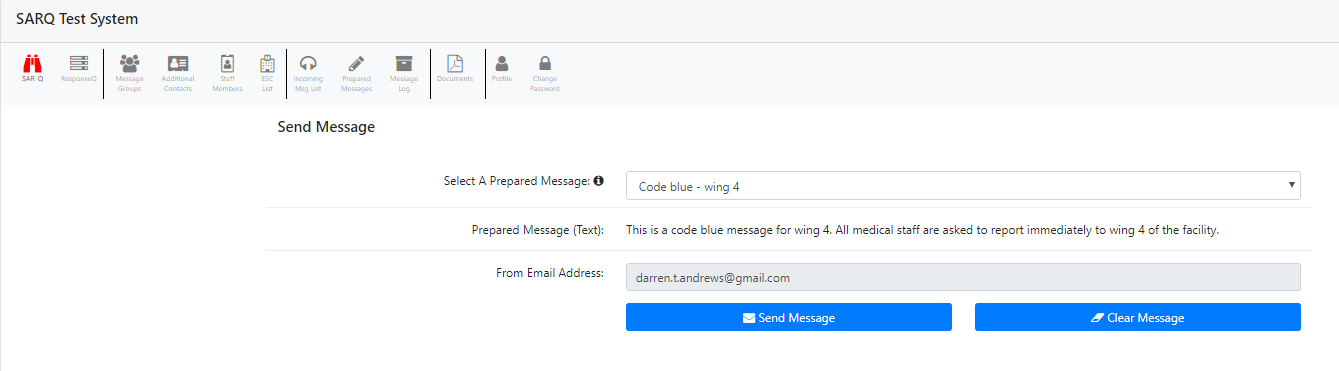
Select the desired message from the drop-down menu.
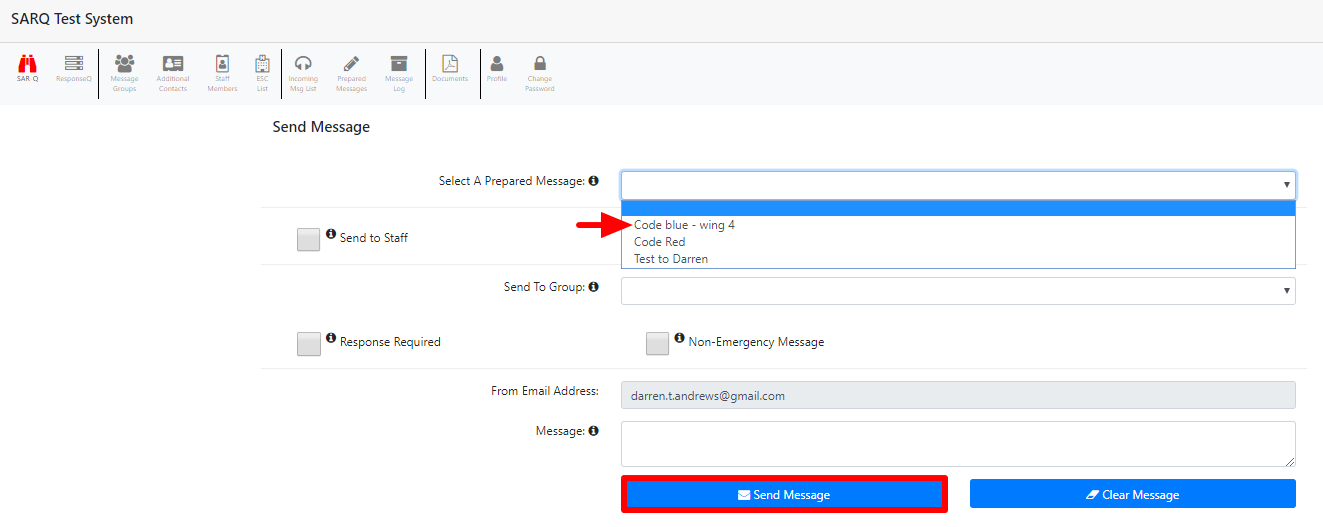
The parameters of the messaging, including to whom it should be sent, are automatically populated from your settings when you created the message. Click the Send Message button to send the message.
TIP
You can learn about creating prepared messages here here.
# Sending an On-the-Fly Message
You can use EQ to send quick, on-the-fly messages. These messages are, likely, messages that will only be sent once and do not need to be saved as a prepared message.
To send a prepared message, click the EQ icon.
![]()
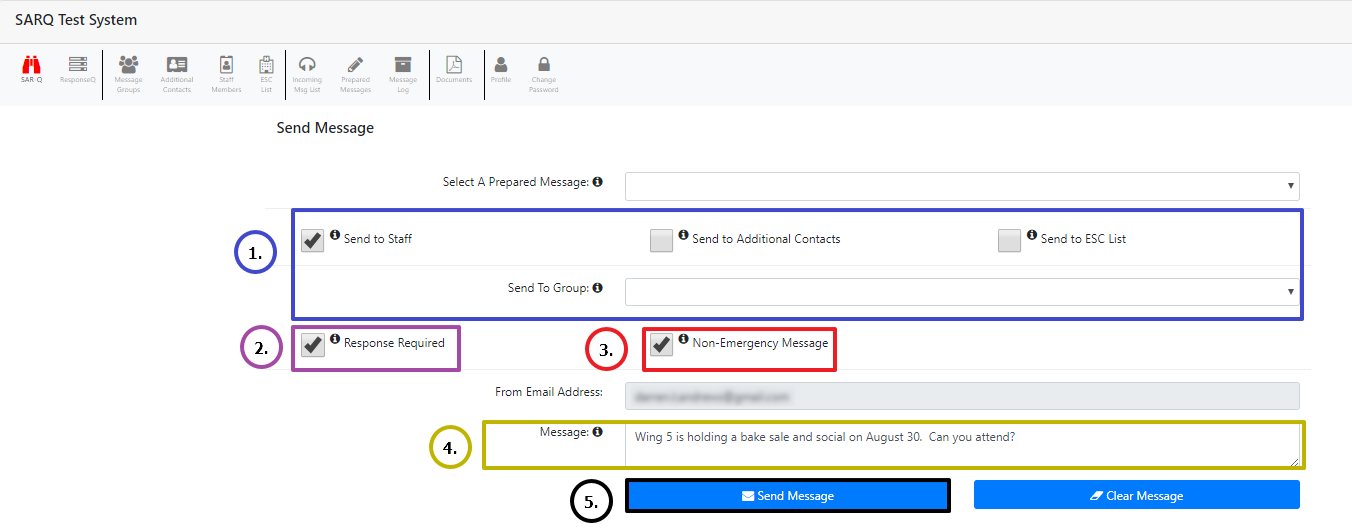
Enter the follwing information:
- Select to whom the message should be sent. You can choose from Staff, Additional Contacts, ESC (Emergency Service Contacts), or a group. If you choose to send a message to specific group, you must also select the group to which you want the message sent. The groups appear in a drop-down menu.
- If you would like a response to your message, check the “Response Required” option. When you choose this option, messages sent via text will automatically include instructions to text yes or no to respond; and, messages sent via the telephone call will automatically include instructions to press “1” for yes and “2” for no.
- If your EQ system includes the option for a second phone number for non-emergency communications, you can choose to send your message using this number. Non-emergency messages are only sent out via a text message or email. There are no phone calls except to those users who are set up to receive a call only.
- Type the content of your messages. We recommend that you limit the character count of your messges to 160 characters or less. Messages with a longer character count could require that the message be sent over two text messages, which could slow delivery times.
- Click the Send Message button to transmit the message.
# Creating a Prepared Message
You can create and save messages in EQ for a variety of situations. By preparing messages in advance, you can determine what the message should say and to whom it should be sent based on specific situations which saves time in emergency situations.
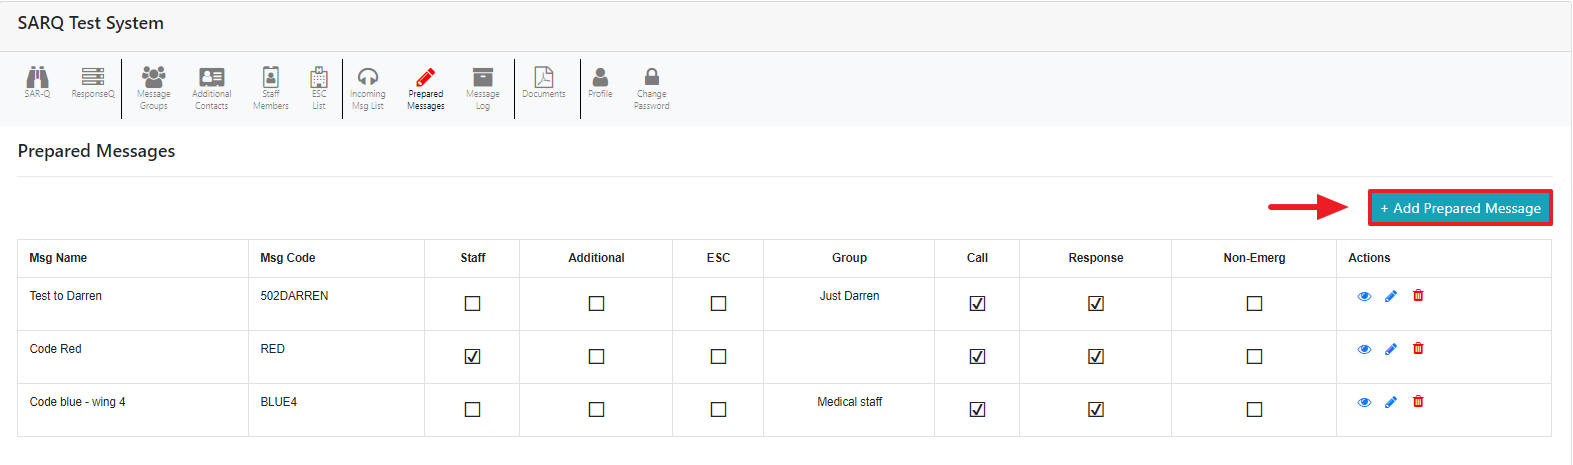
To create a prepared message, click the Prepared Messages icon.

Click the Add Prepared Message button.
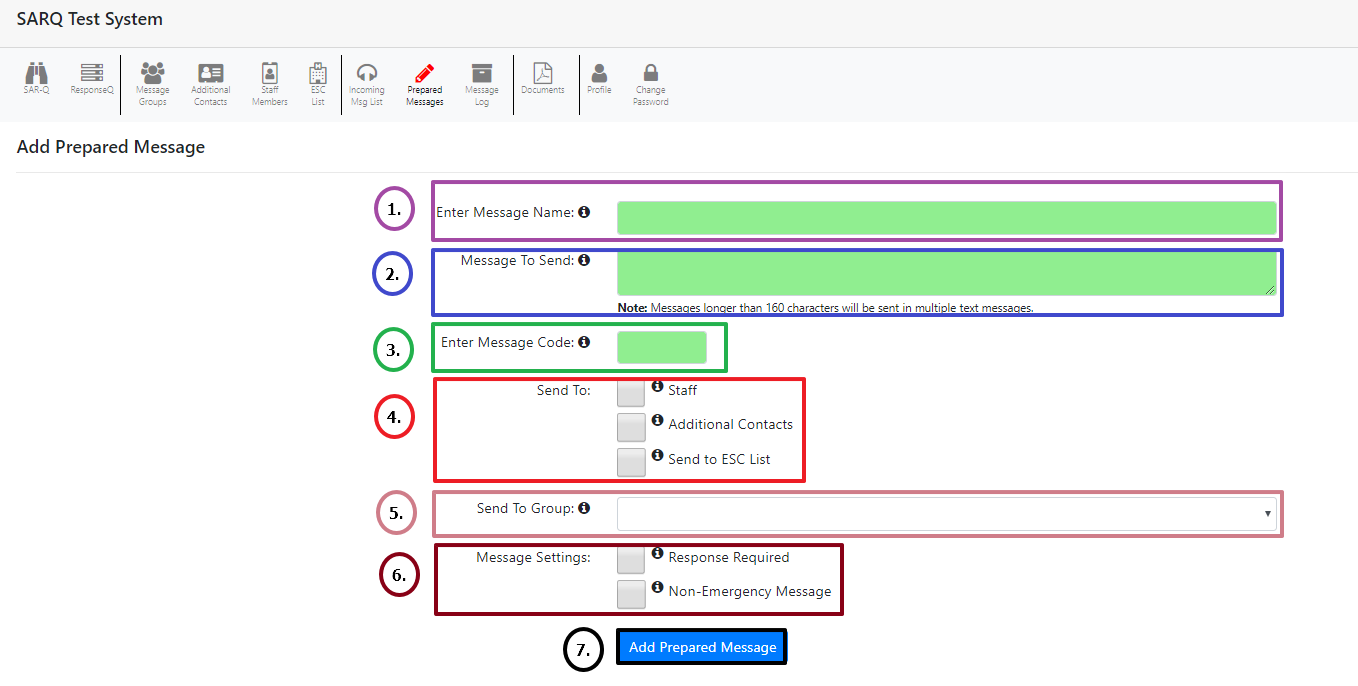
Enter the following information:
- Enter a name for the message. This message name will appear in the drop down list when you send a new message.
- Type the content of your message. We recommend that you limit the character count of your messges to 160 characters or less. Messages with a longer character count could require that the message be sent over two text messages, which could slow delivery times.
- Enter a Message Code. This code should be a mix of capital letters and numbers with no spaces (e.g. 502EVAC). This code can be used for sending out a message quickly via an incoming text message from an authorized user.
- Choose to whom the message should be sent. The message will be sent out to all members that have been added as staff, additional contacts, or emergency contacts.
- If you wish to send the message to a specific group, select the appropriate group from the drop-down list.
- Choose the settings you wish to apply to the message. a. If you select “Response Required”, the phrase “text yes or no to respond” will be added to each text message; and the phrase “press 1 for yes and 2 for no” will be added to each telephone call. b. If you select, “Non-Emergency Message”, your message will be sent from a number designated for non-emergency messages (if a non-emergency phone number has been linked to your account). Non-emergency messages are only sent out via a text message or email. There are no phone calls except to those users who are set up to receive a call only.
- Click the Add Prepared Message button at the bottom of the form to save the message.
# Sending a Prepared Message via Text
To send a message without having to log into the EQ system, you can dispatch a pre-written message by texting the prepared message’s message code to the phone number assigned to your EQ system. Before a user can send a pre-written message, they must be authorized to do so within your staff user management area.
To authorize a staff member to send a prepared message via an incoming text message, click the Staff Members icon.

Select the staff member whose information you wish to edit and click the blue pencil to edit the staff contact.
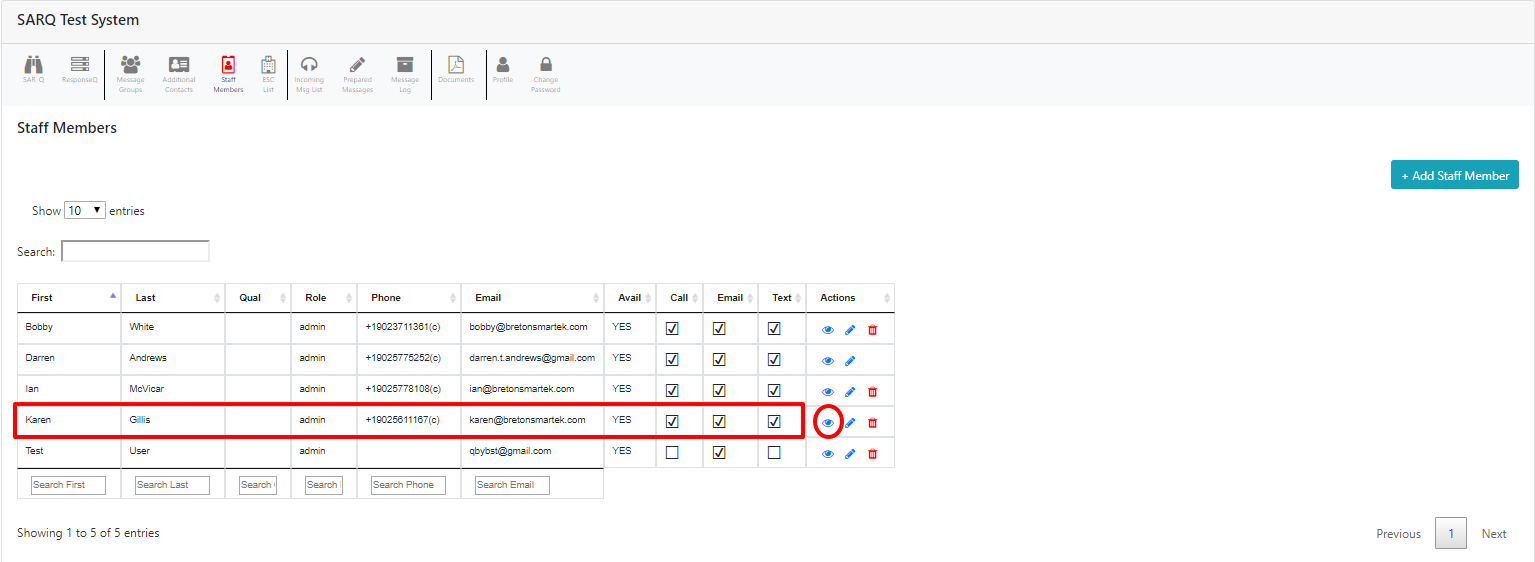
Scroll to the bottom of the page to the Admin Settings area. Check the box for Send prepared messages.

On your mobile device, text the prepared message code to the emergency phone number assigned to your EQ account.
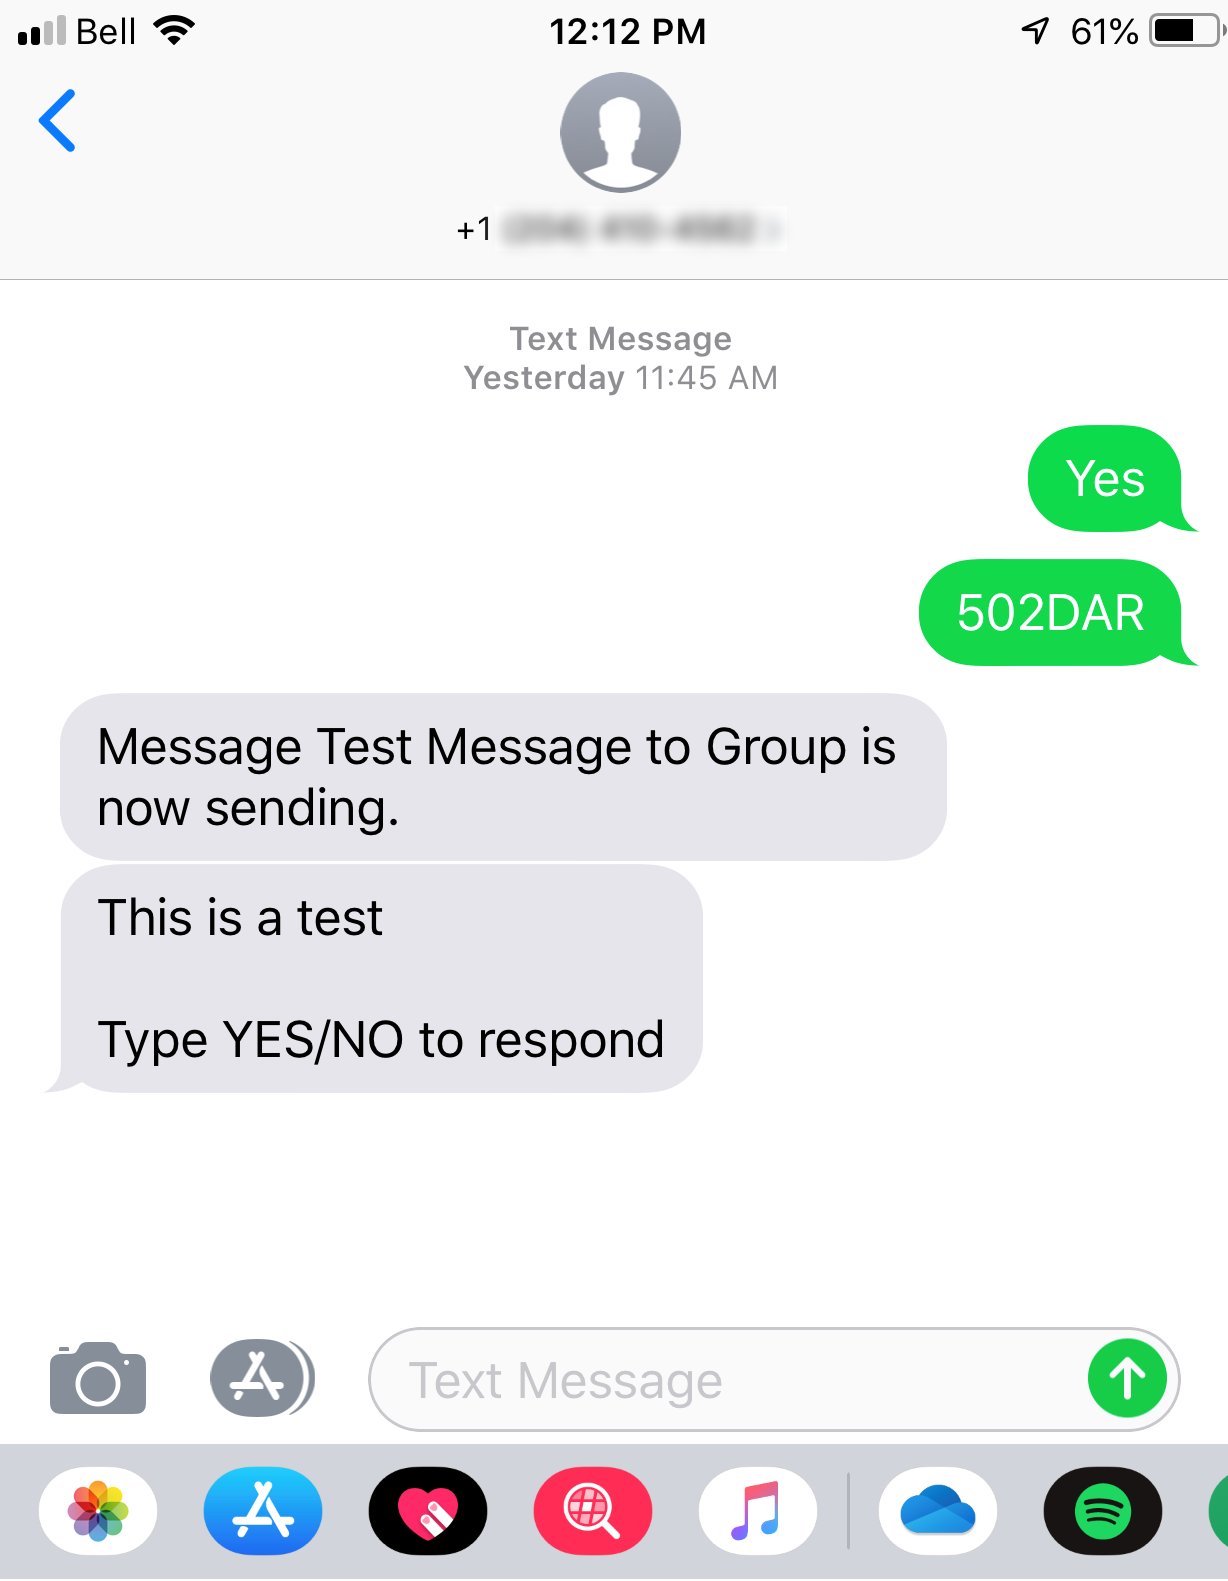
Sending Prepared Messages via Text
This is a powerful feature that allows authorized people to send emergency messages via a simple text. You should limit the number of people empowered to do this.
# Creating Groups
You can create staff groups within EQ to help you send more targeted messaging. Message groups, for example, can used to group staff according the departments in which they work or their proximity to the facility.
To create a message group, click the Message Groups icon.

Click the Create Group button.
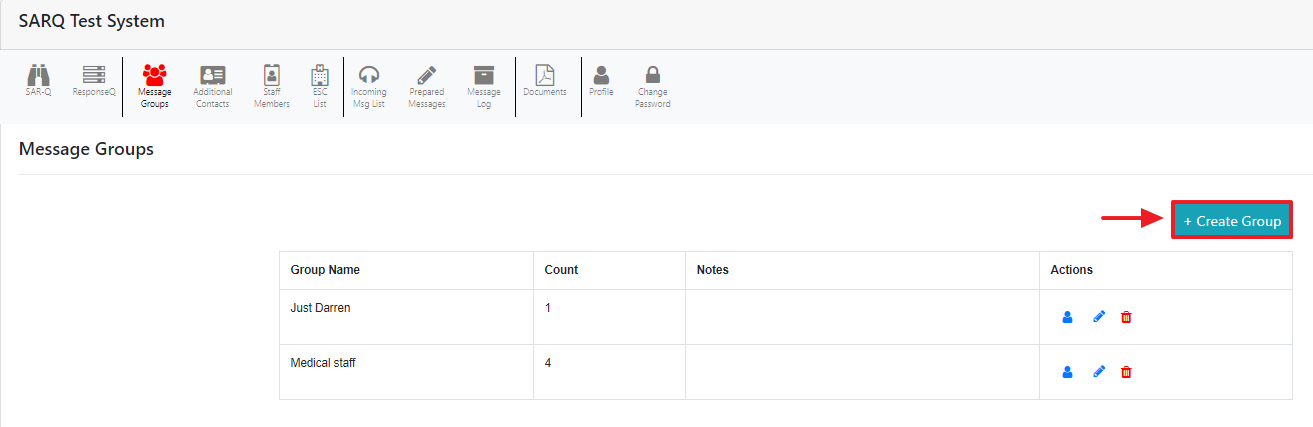
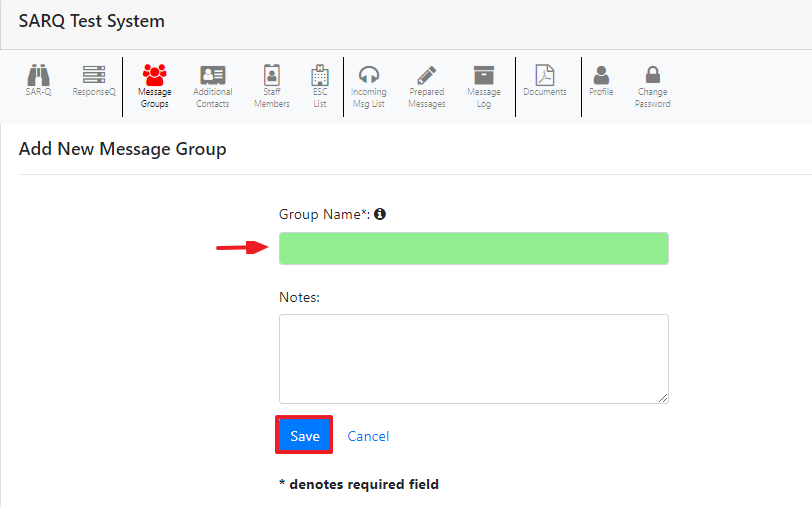
Give your group a name and click the “Save” button.
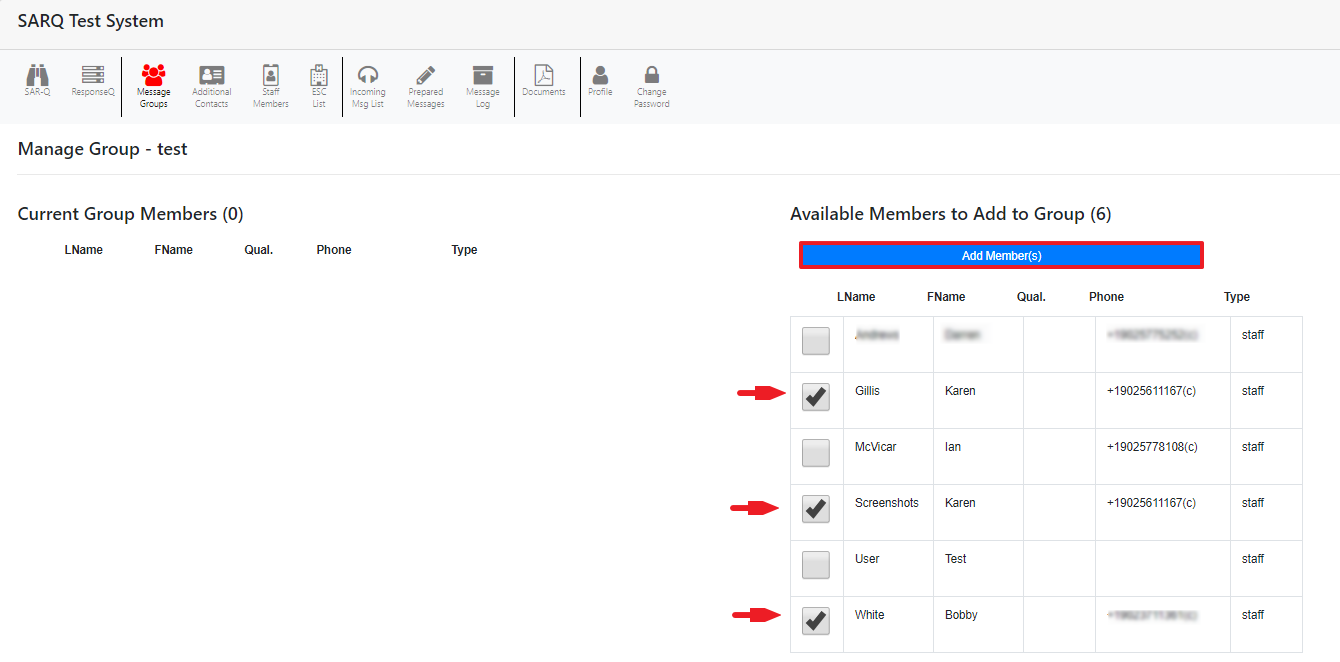
To add Staff members to any group, select the desired group and click the blue people icon.

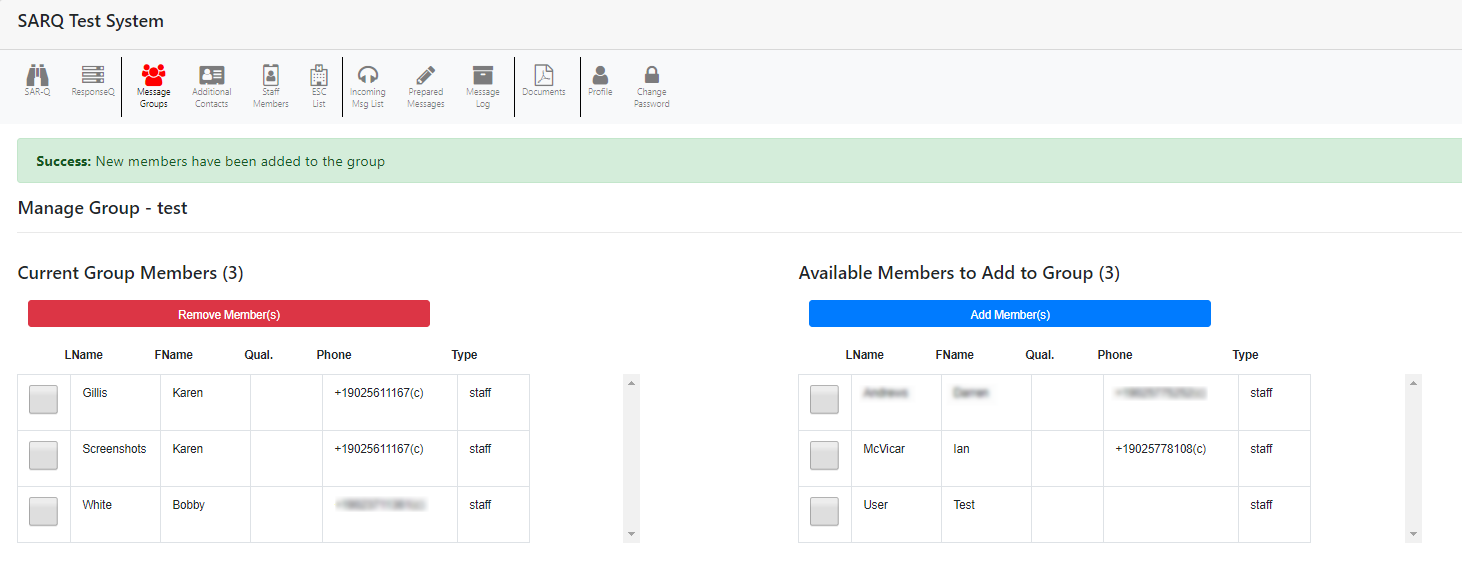
Select the staff members that you want to add to the group and click the Add Member(s) button.
The current group members will be populated in the list at the left.
# Monitoring the Response to a Message
Once you have sent a message through your EQ system, it is possible to monitor it real time. To monitor a message, click the ResponseQ icon.

The ResponseQ screen provides you significant detail about the messages you send. This information includes:
- the content of the message, who sent it and when it was sent;
- how many texts, calls and emails were sent with each message;
- send additional, follow-up messages;
- at-a-glance tally of yes and no responses;
- who, exactly, responded to the message and when they responded; and,
- a transaction log with expanded detail about the response history of each message.

The ResponseQ screen provides administrators and incident managers with at-a-glance response information to messages sent through the EQ system.