# The FireQ Notification Center
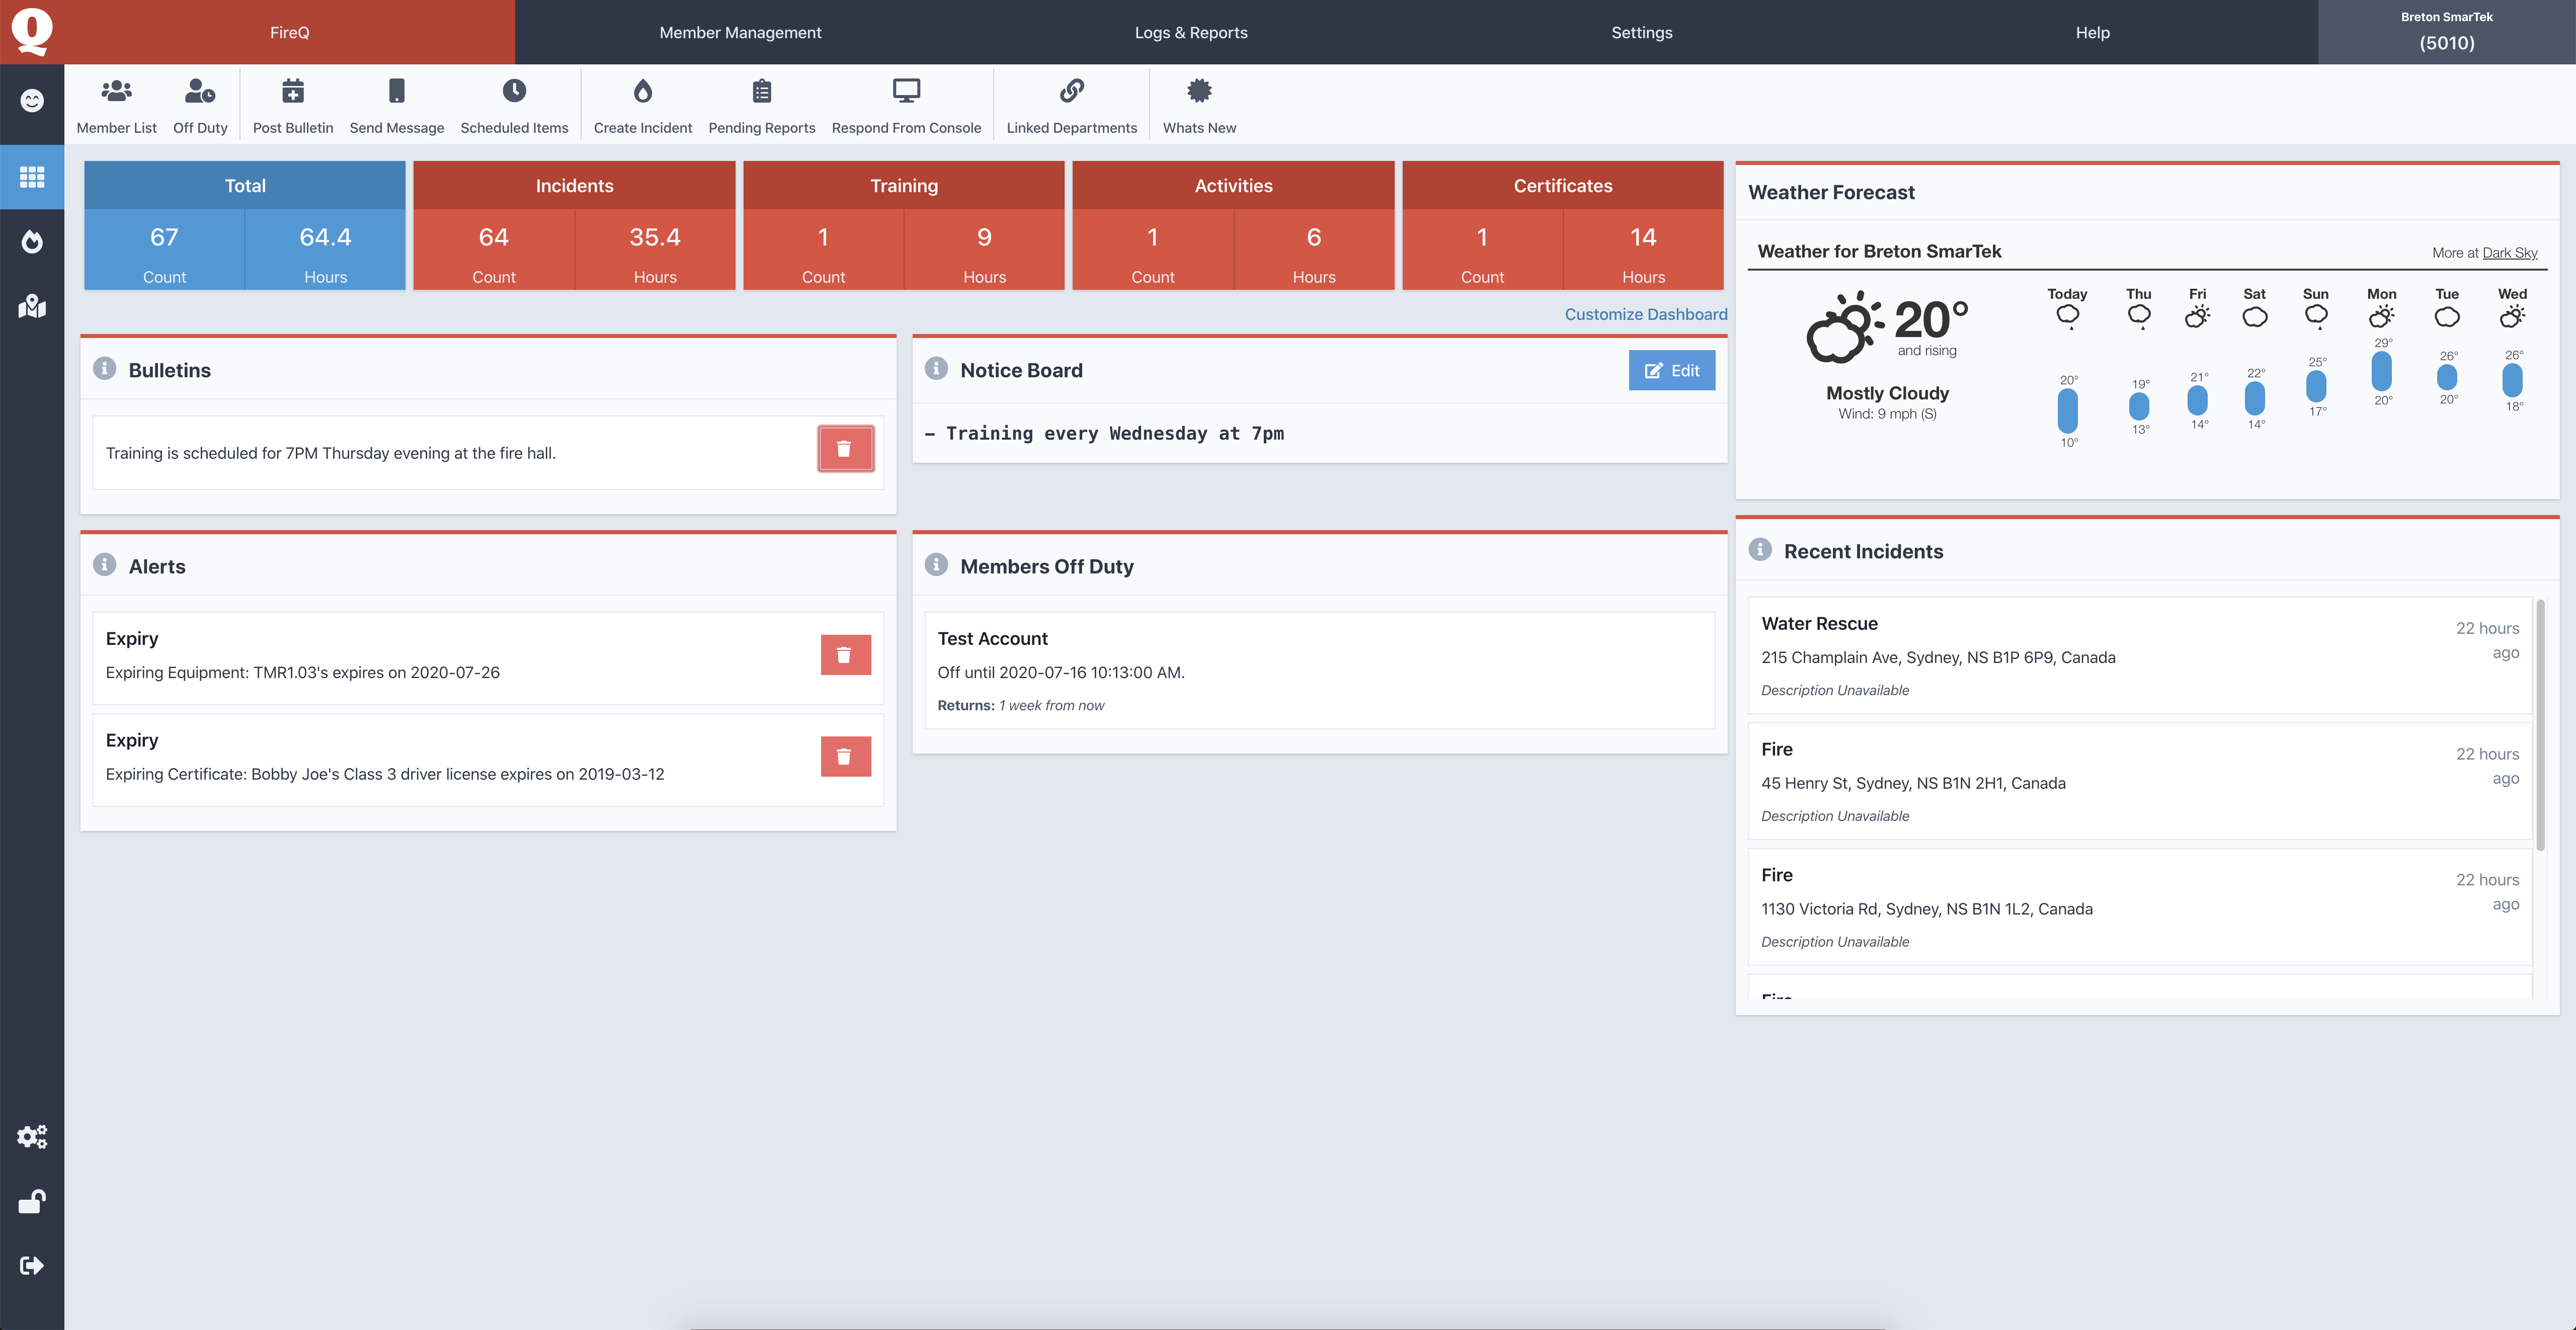
The FireQ Notification Center is a dashboard that serves as an electronic bulletin board, a central hub where relevant information is displayed all in one place. The types of information visible here can include:
- Fire department statistics that include the total number and hours accumulated for incident response, training and other activities.
- Bulletins - notifications that are sent to all members through the FireQ app, as well as creating a stickied message on the message screen. They can be created with an expiry date so that the message will disappear automatically.
- Notice board for upcoming events and important dates
- An at-a-glance view of the local weather conditions
- Alerts about expiring equipment and certifications - Alerts provide information about expiry dates that have been entered into the system. Alerts will also broadcast reminders about expiring certifications. Alerts are posted 30 days prior to the entered expiry date.
- Off-duty member list - Member duty status provides at-a-glance information about which firefighters are off-duty and unavailable, as well as the date of their return.
- A list of the most recent calls to which the department has responded
REMINDER
Fire departments can customize what is displayed in the FireQ Notification Center.
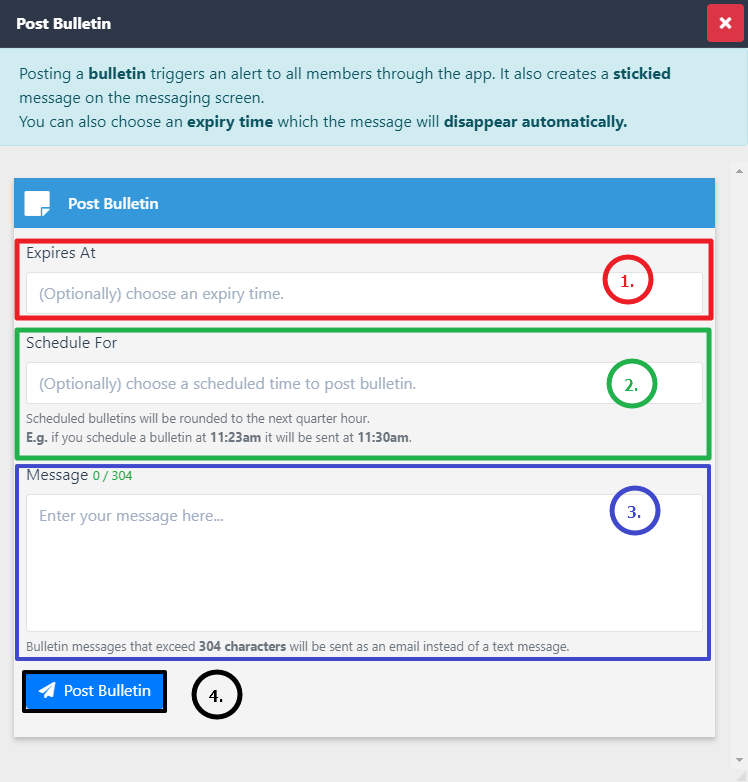
# Posting a Bulletin
To create a bulletin, navigate to the FireQ tab and click the POST BULLETIN button.

- Select the date and time you would like the message to expire.
- To schedule a message to go out at a future data, set the time and date when the message should be released.
- Enter the message content.
- Click the POST BULLETIN button.
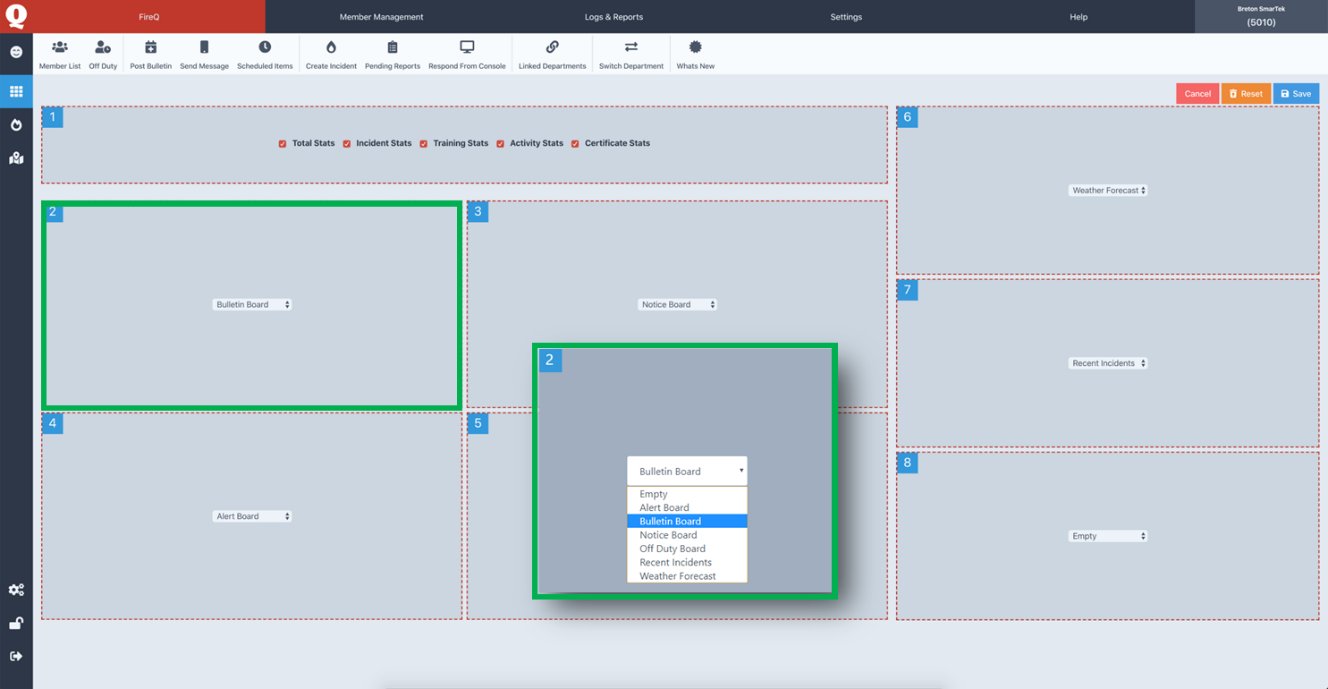
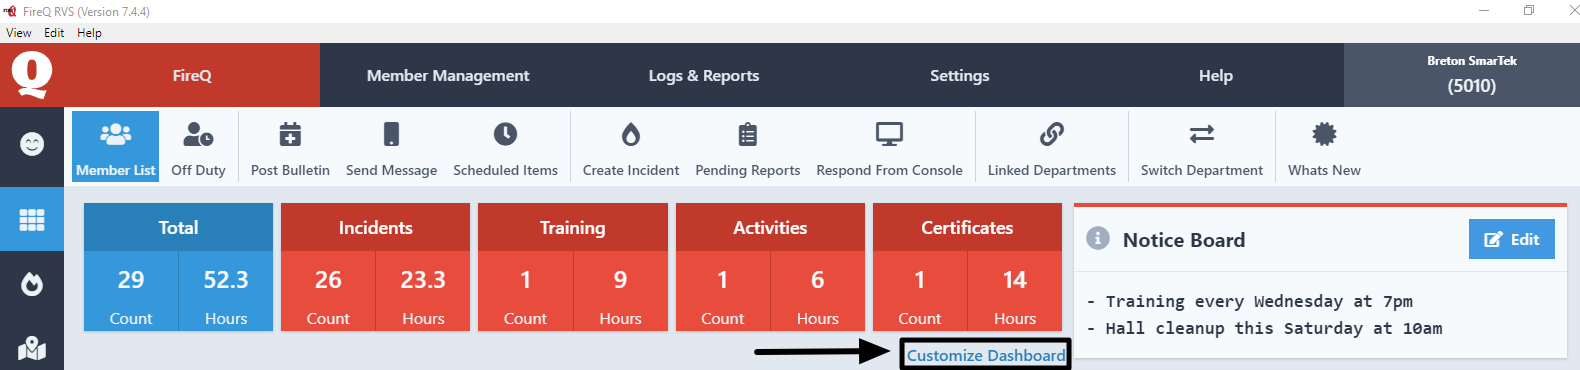
# Customize the Dashboard
Users can customize the tiles that appear, as well as the order in which they appear, in the FireQ Notification Center. To change the appearance of the FireQ Notification Center, click the CUSTOMIZE DASHBOARD button.
Each tile contains a drop-down menu of tile choices that can occupy that space. It is also includes an option to leave the space empty. Select the desired option for each tile and click the SAVE button.