# Contacts
# Staff Contacts
# Adding Staff Contacts
To add a new staff contact to your SARQ system, click the Staff Members icon.

Click the Add Staff Member button.
![]()
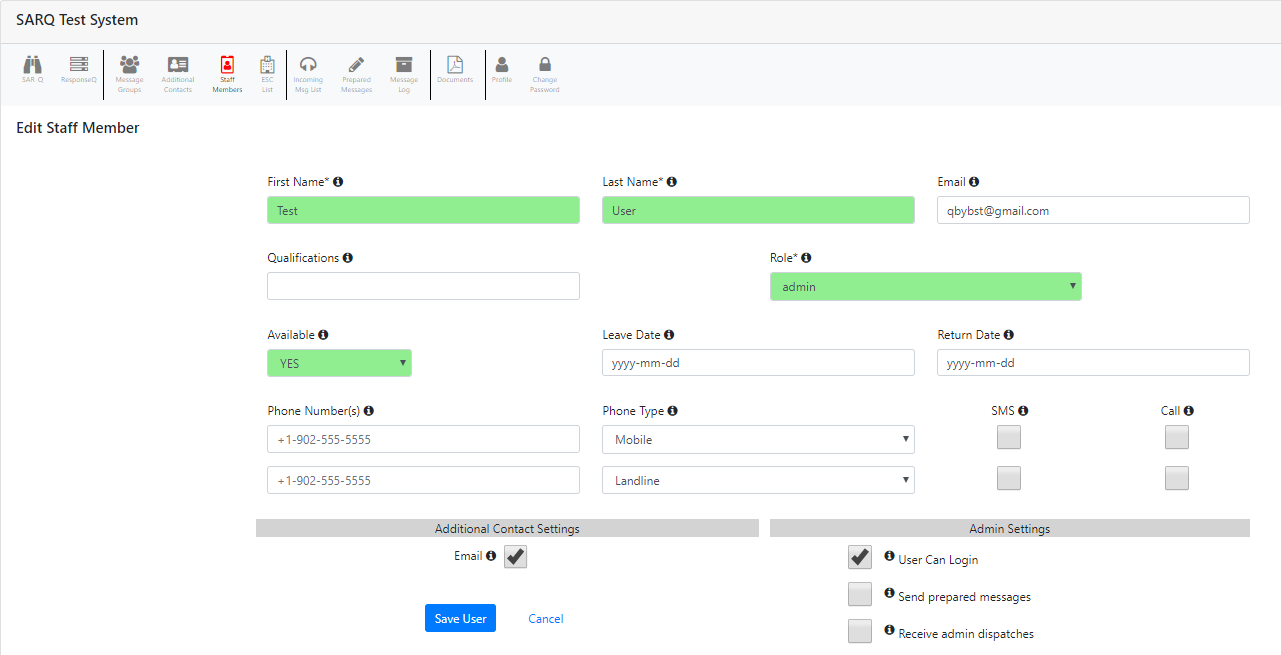
Enter the following information:
- Enter the first name, last name and email of the staff member. The email address is optional. However, if an email address is entered, it must be unique (you cannot have 2 users within your account using the same email address).
- Enter the qualifications of the staff member. Entering the qualifications of each staff member could save you time when it comes time to send messages because you can sort staff by qualification.
- Select the role you want the staff member to have” a. Admin – users set to admin have full access over all parts of the SARQ system b. Contact manager – users set to contact manager can manage contact lists, which means they can edit and add staff, emergency service contacts and additional contacts. c. Member – users set as members can only access their own profile. You can, if desired, give each staff member access to the system so that they can maintain their own contact information. d. Owner – same level of privilege as admin. Reserved for manager of account. e. Power-user – users set as power-users can send messages
- Set the availability of the staff member. The member can be set to “On Duty” or “Off Duty”. You can also indicate dates that the member will be off duty.
- You may add one or two phone numbers for the contact. The phone number must contain a + followed by the country code, followed by the 10-digit number (e.g. +1-902-555-5555). Each contact may receive a single text message (and a call if an emergency). Check the boxes to indicate the method of contact for each number.
- Check the email checkbox if the staff member is to receive messages to their email address.
- Check the administrative options that apply to the member. a. User can login will allow the user to log into the SARQ system. What the member can access is determined by the permission level set in Step 3. b. Send Prepared Messages will allow the user to send a prepared message via an incoming text message (See the “SARQ Sending a Prepared Message Via Text” document). c. “Receive admin dispatches” is used in conjunction with the dispatch module. Messages sent from the dispatch module will be sent to members with this checkbox checked.
- Click the Add User button.

# Searching for a Staff Member in the Staff List
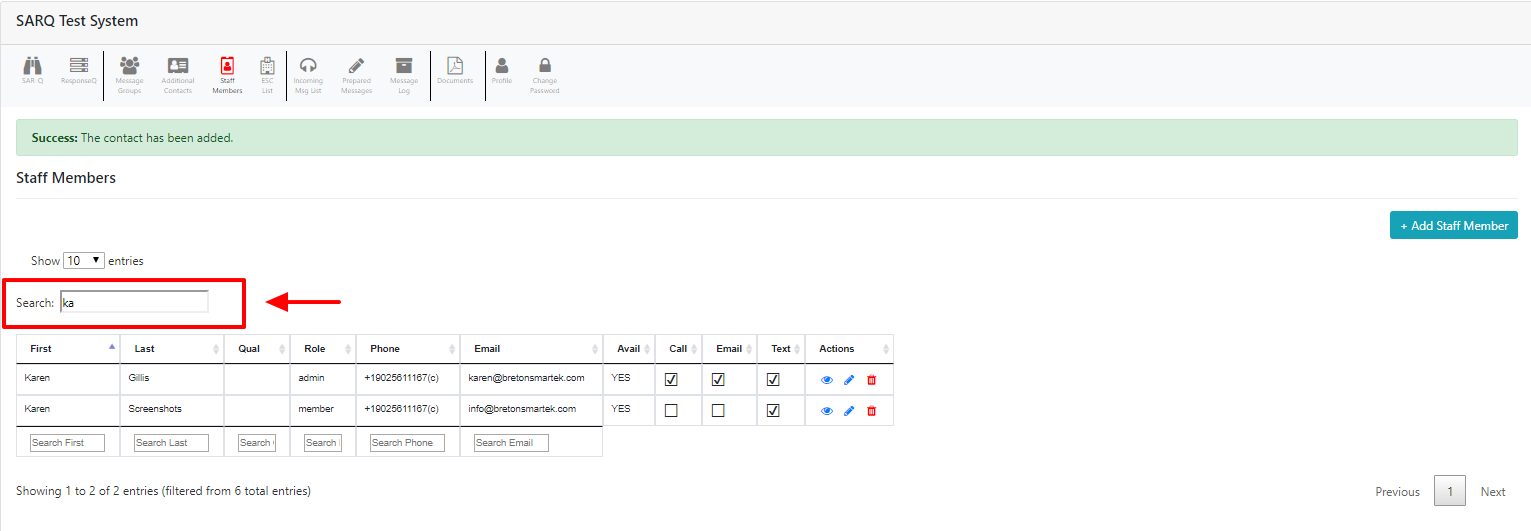
To simplify the search for a specific staff member, you can filter staff contacts by first or last name.To search for a specific staff member in the staff list, begin typing the letters of the first or last name in the search box.
# Editing an Existing Staff Member
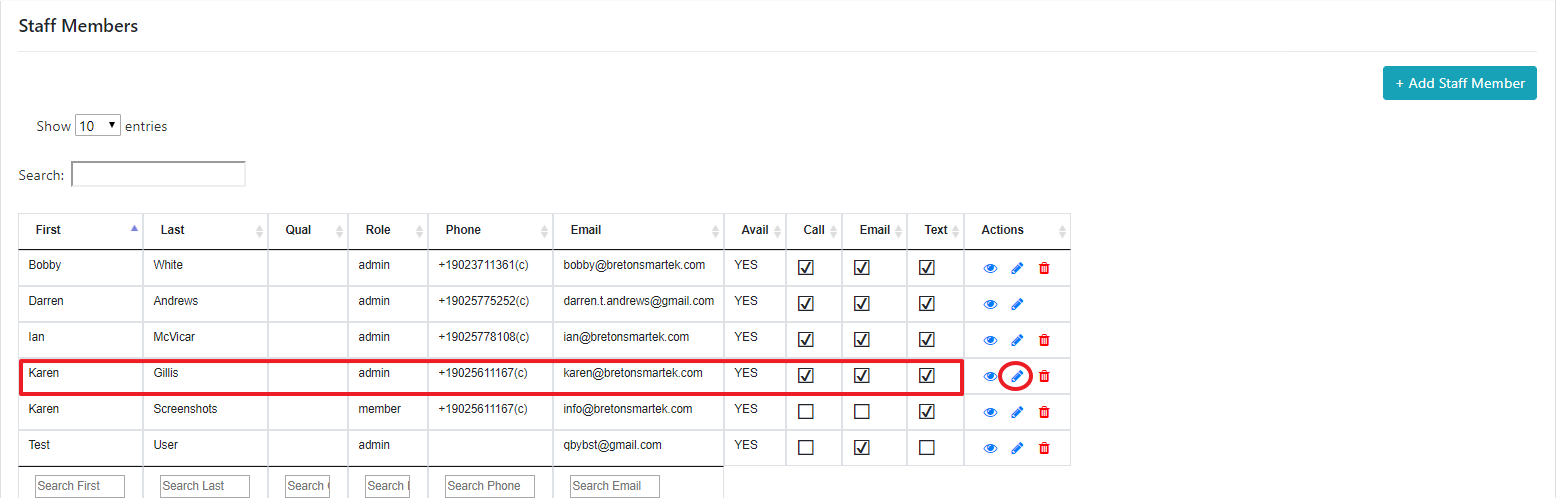
To edit an existing staff contact, click the Staff Members icon.
Select the staff member whose information you wish to edit and click the blue pencil to edit the staff contact.
Change the desired information and click the Save button.
# Emergency Services Contacts
# Adding an Emergency Services Contact
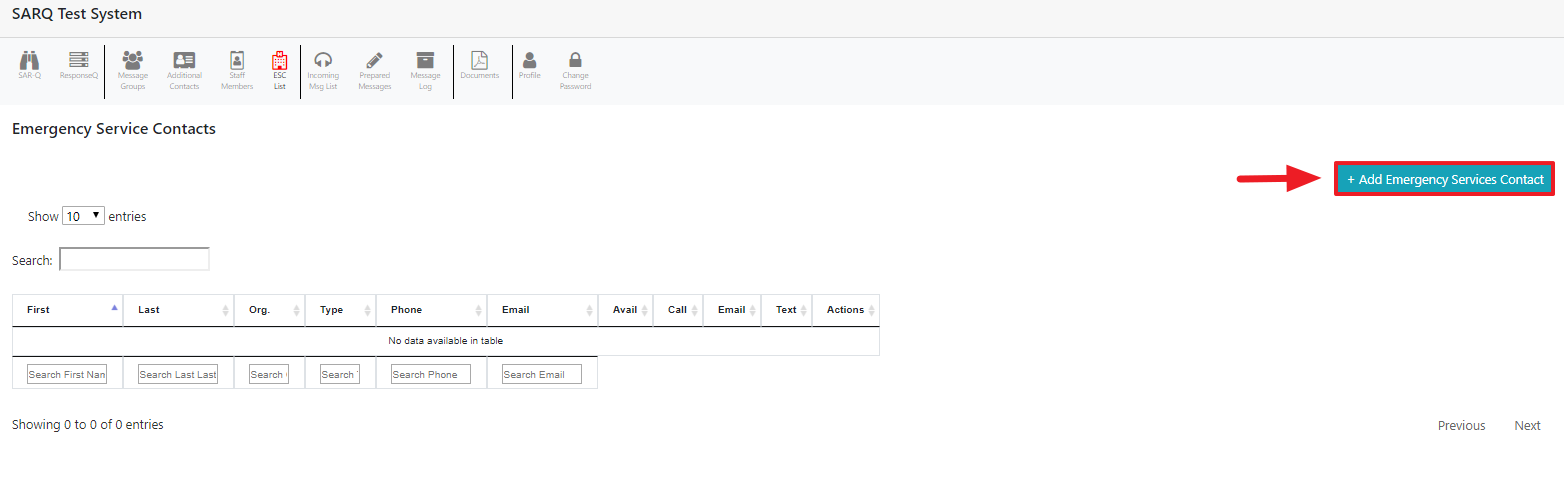
The Emergency Services Contacts section of your SARQ system allows you to track contact information for community partners or other service providers on whom you may rely in the event of an emergency. These contacts could include such things as fire, police, transportation support or any service you could need to contact during a search.
To add an emergency services contact, click the ESC List icon.

Click the Add Emergency Services Contact List button.
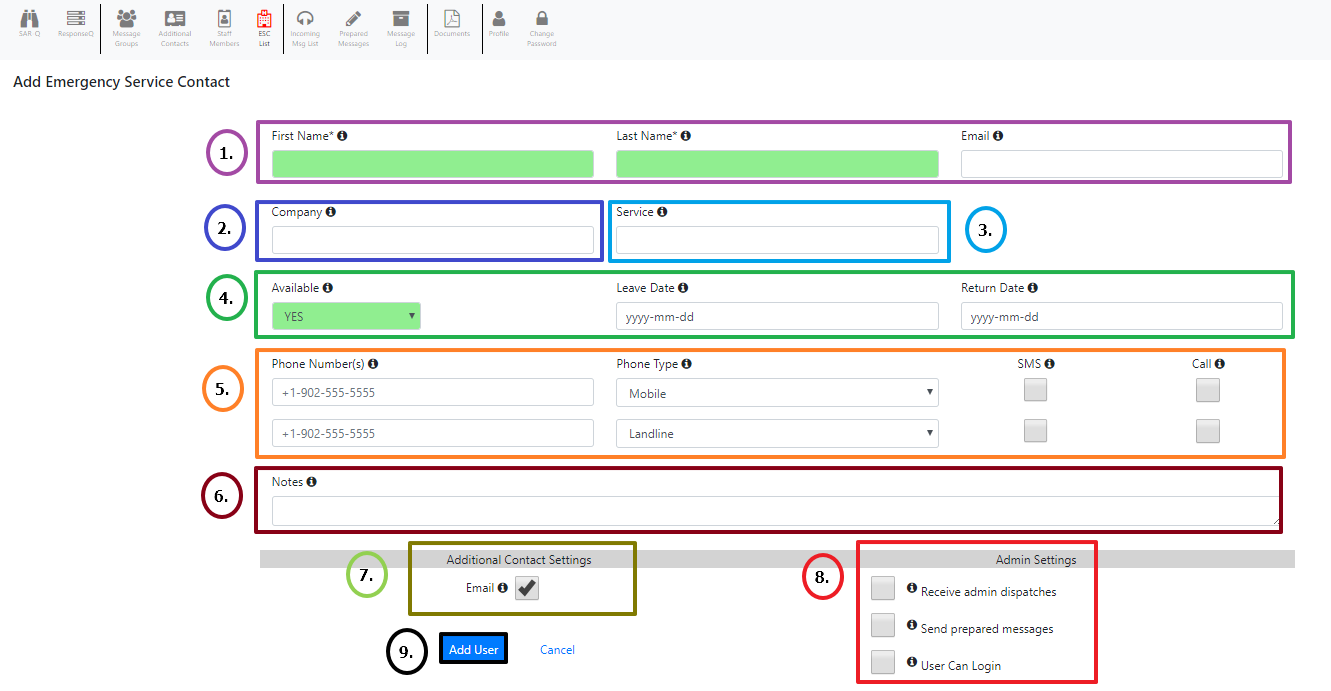
Enter the following information:
- Enter the first name, last name and email of the contact. The email address is optional. However, if an email address is entered, it must be unique (you cannot have 2 users within your account using the same email address).
- Enter the organization the emergency services contact works for (optional).
- Enter the type of service the emergency services contact provides (optional)
- Set the availability of the contact. The contact can be set to “On Duty” or “Off Duty”. You can also indicate dates that the contact will be off duty.
- You may add one or two phone numbers for the contact. The phone number must contain a + followed by the country code, followed by the 10-digit number (e.g. +1-902-555-5555). Each contact may receive a single text message (and a call if an emergency). Check the boxes to indicate the method of contact for each number.
- Enter additional details to describe the contact (optional).
- Check the email checkbox if the contact is to receive messages to their email address.
- Check the administrative options that apply to the contact. a. “Receive admin dispatches” is used in conjunction with the dispatch module. Messages sent from the dispatch module will be sent to users with this checkbox checked. b. Send Prepared Messages will allow the user to send a prepared message via an incoming text message (See the “SARQ Sending a Prepared Message Via Text” document). c. User can login will allow the user to log into the SARQ system and manage their profile.
- Click the Add User button.
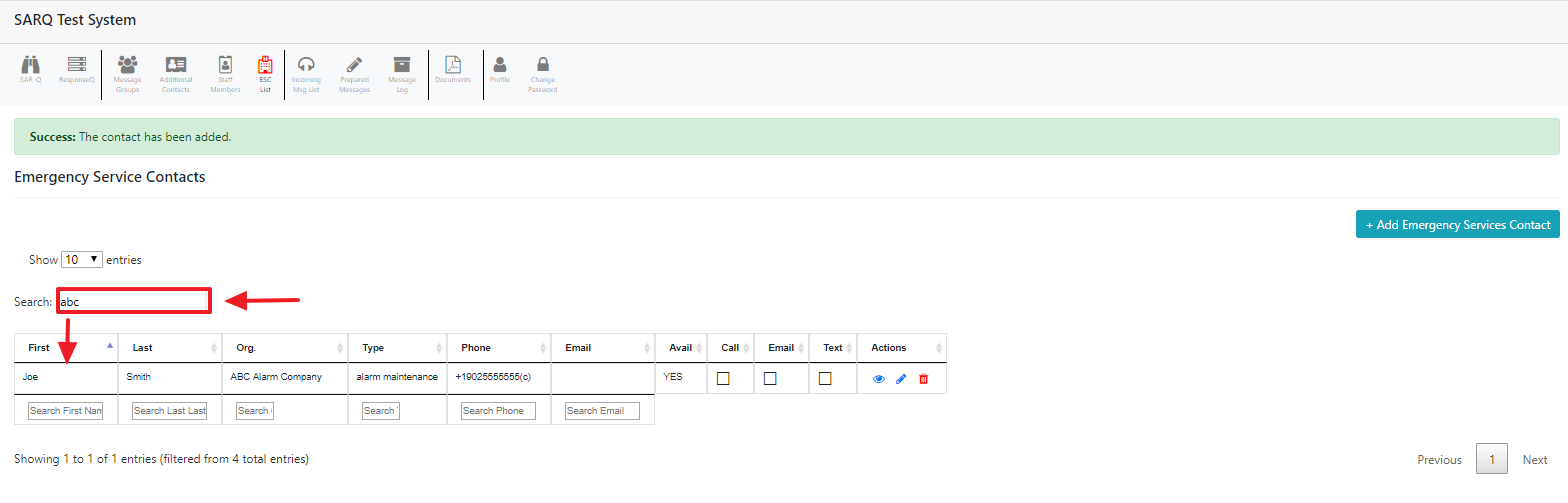
# Search ESC Contacts
To simplify the search for a specific ESC, you can filter staff contacts by first name, last name or company name.To search for a specific staff member in the staff list, begin typing the letters of the first or last name in the search box.
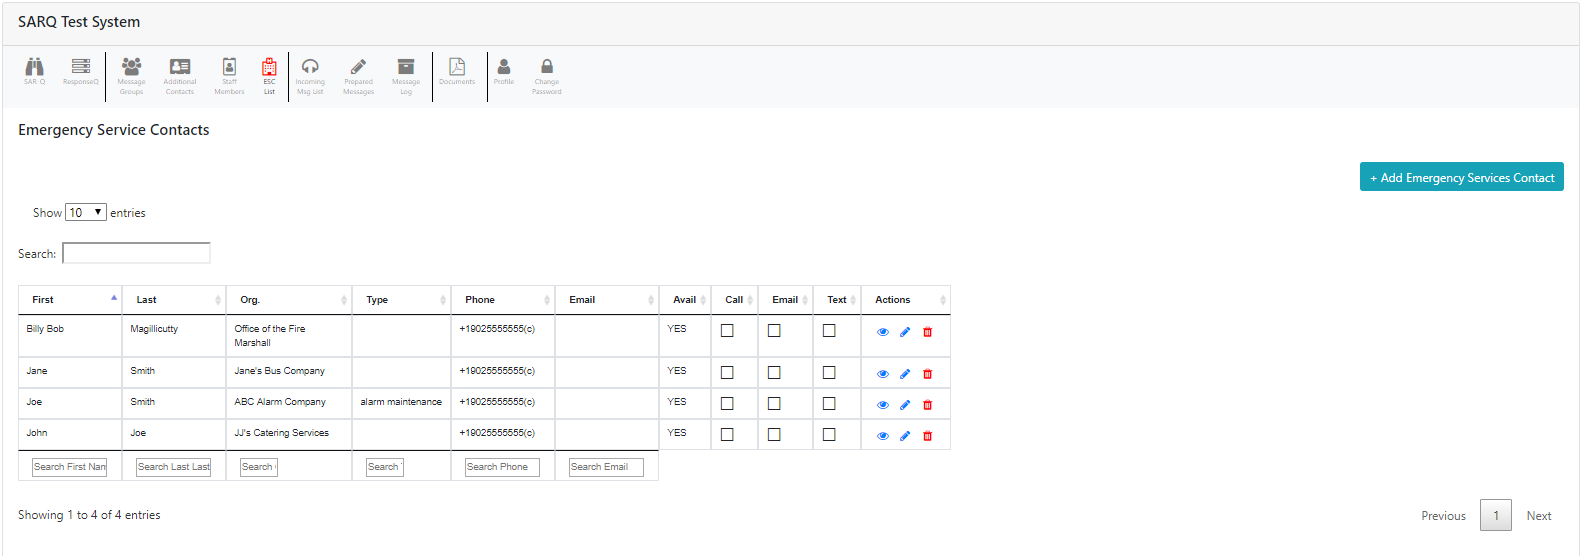
# Editing an Existing ESC Contact
To edit an existing ESC contact, click the ESC List icon.
Select the staff member whose information you wish to edit and click the blue pencil to edit the staff contact.
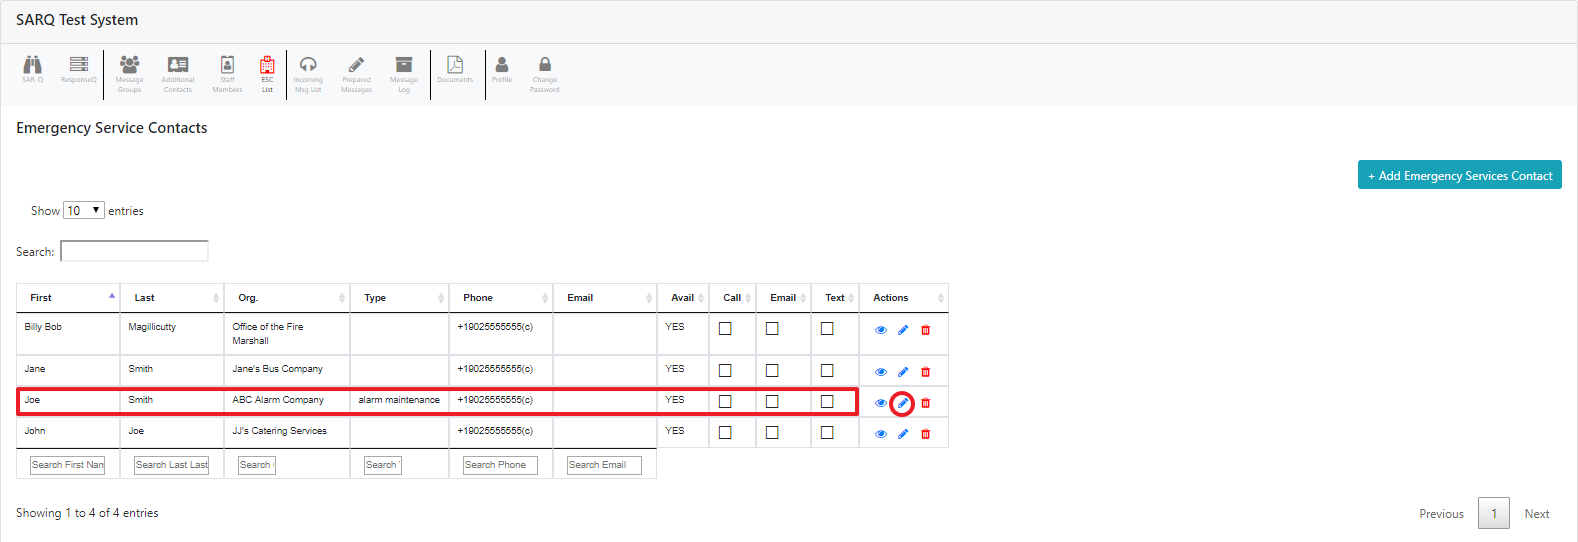
Change the desired information and click the Save button.
# Additional Contacts
# Adding Additional Contacts
The Additional Contacts section of your SARQ system allows you to track contact information for community partners or other service providers on whom you may rely in the event of an emergency. These contacts could include family members of searchers to keep them up-to-date about when searchers may be returning home.
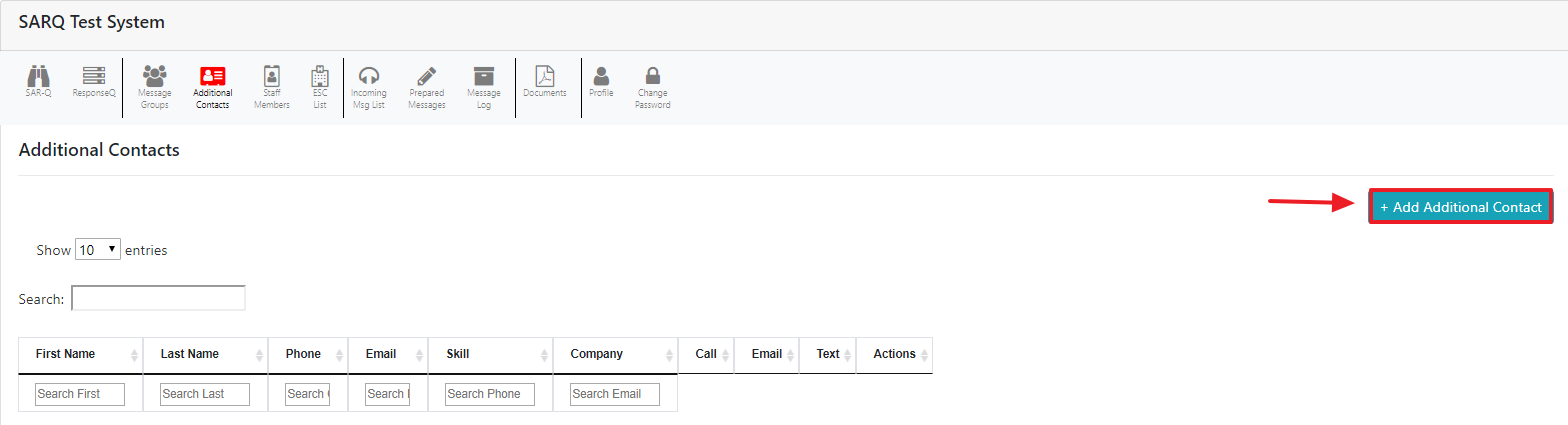
To enter an additional contact, click the Additional Contacts icon.

Click the Add Additional Contact button.
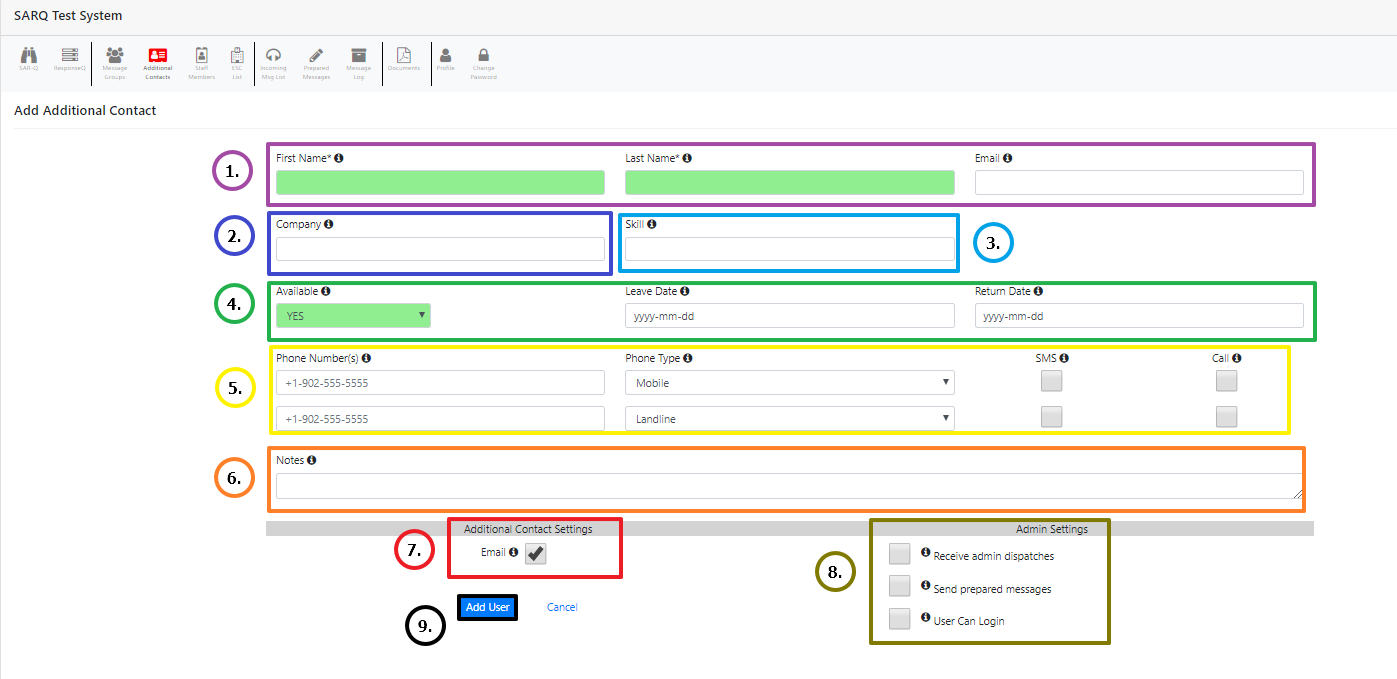
Enter the following information:
- Enter the first name, last name and email of the contact. The email address is optional. However, if an email address is entered, it must be unique (you cannot have 2 users within your account using the same email address).
- Enter the company the additional contact works for (optional).
- Enter the type of service the additional contact provides (optional)
- Set the availability of the contact. The contact can be set to “On Duty” or “Off Duty”. You can also indicate dates that the contact will be off duty.
- You may add one or two phone numbers for the contact. The phone number must contain a + followed by the country code, followed by the 10-digit number (e.g. +1-902-555-5555). Each contact may receive a single text message (and a call if an emergency). Check the boxes to indicate the method of contact for each number.
- Enter additional details to describe the contact (optional).
- Check the email checkbox if the contact is to receive messages to their email address.
- Check the administrative options that apply to the contact. a. “Receive admin dispatches” is used in conjunction with the dispatch module. Messages sent from the dispatch module will be sent to users with this checkbox checked. b. Send Prepared Messages will allow the user to send a prepared message via an incoming text message (See the “SARQ Sending a Prepared Message Via Text” document). c. User can login will allow the user to log into the SARQ system and manage their profile.
- Click the “Add User” button.
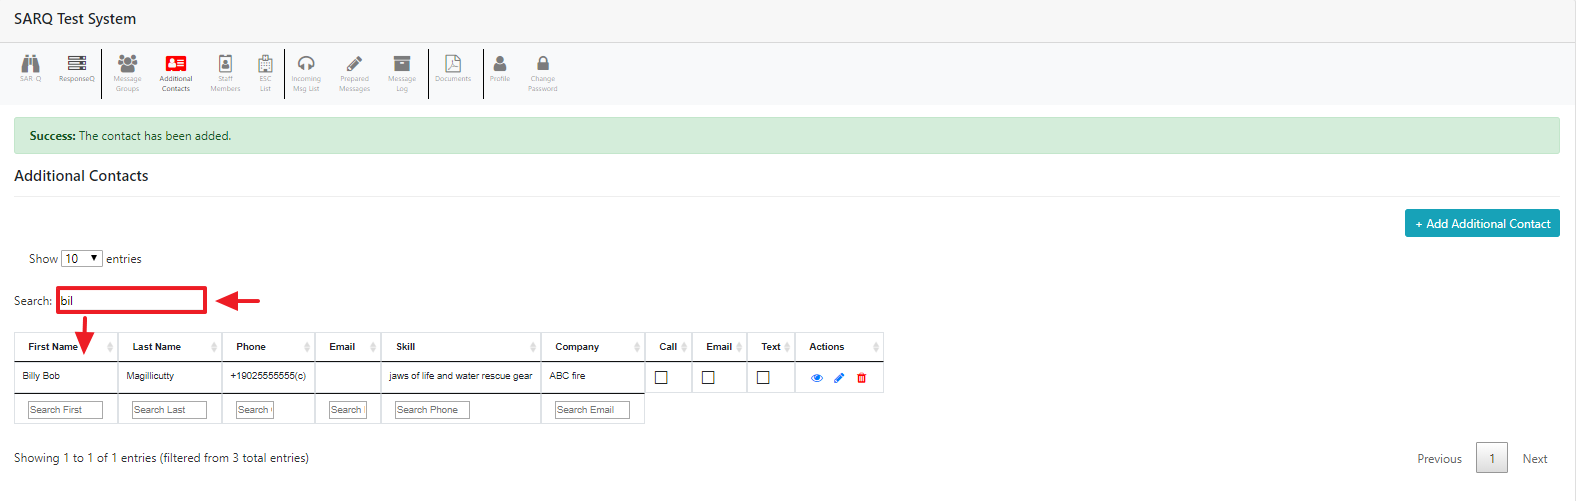
# Searching Additional Contacts
To simplify the search for a specific additional contact, you can filter contacts by first or last name.To search for a specific additional, begin typing the letters of the first or last name in the search box.
# Editing an Existing Additional Contact
To edit an existing ESC contact, click the ESC List icon.
Select the staff member whose information you wish to edit and click the blue pencil to edit the staff contact.
Change the desired information and click the Save button.