# Pre-plans
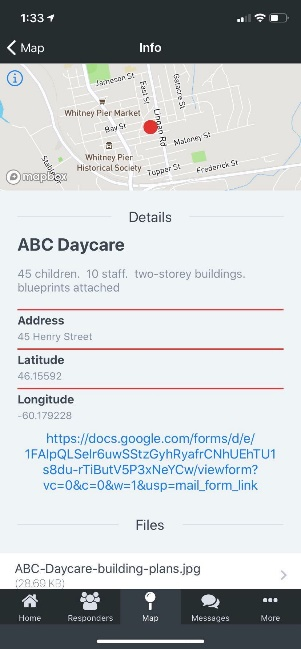
The National Fire Protection Association (NFPA) defines a pre-incident plan as “a document developed by gathering general and detailed data that is used by responding personnel in effectively managing emergencies for the protection of occupants, responding personnel, property, and the environment.” (NFPA 1620-2010 Edition). Fire departments across North America receive incident pre-plans from organizations, building owners and safety managers in the communities they serve. These pre-plans and any supplementary information can be stored within FireQ and made available to fighters quickly and easily.
Storage
The standard FireQ annual subscription includes 1G of storage for pre-plans and supporting documents. More storage, if needed, can be purchased.
# Adding a Pre-Plan to FireQ
To add a pre-plan, navigate to the LOGS & REPORTS tab and click the PRE-PLANS button.

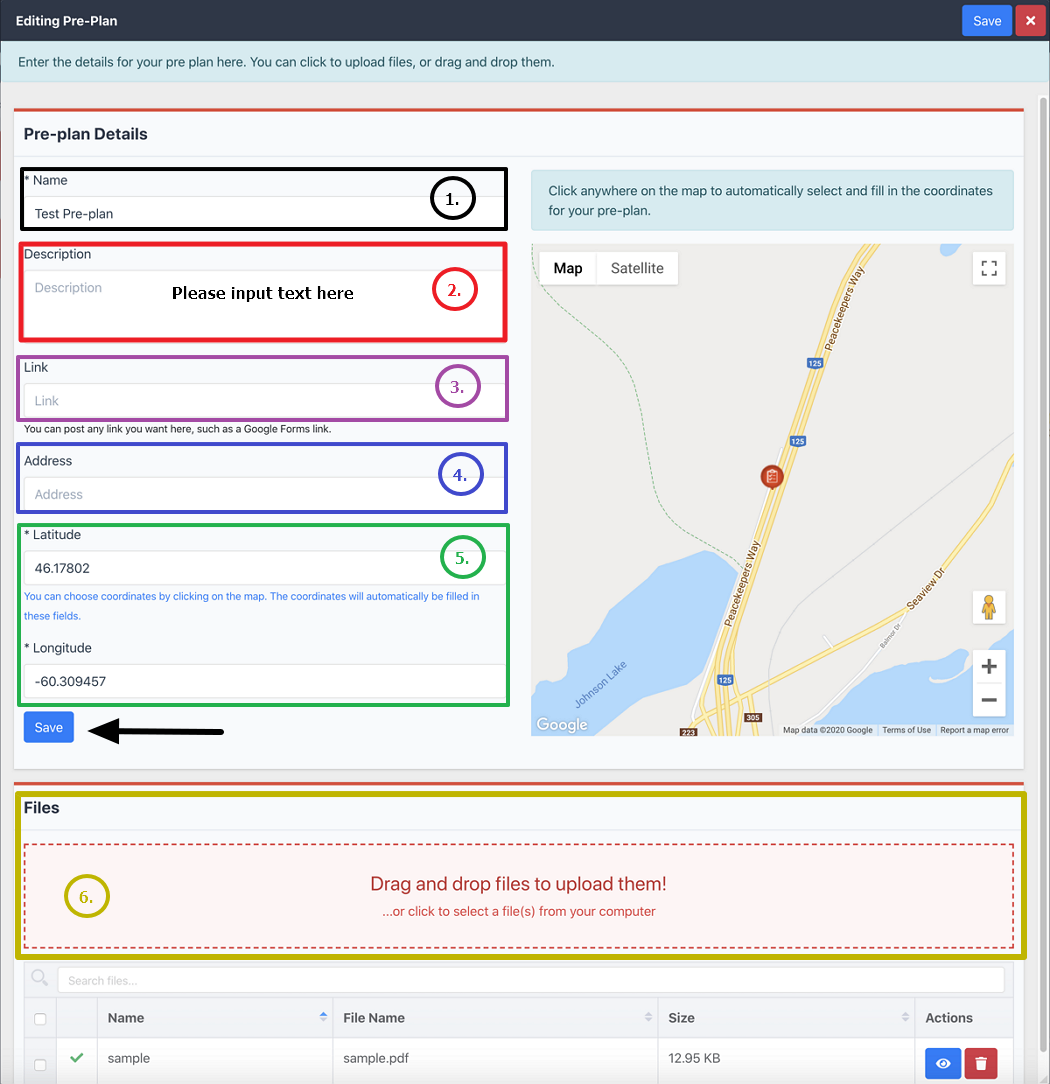
Enter the details of the pre-plan: 1.) Name of the pre-plan – this field is required 2.) A brief description of the pre-plan 3.) Relevant links – this could include such things as a link to Google forms 4.) The address – enter the address of the building for which a pre-plan is created. The address information is provided to allow firefighters to easily assess the incident location. 5.) Latitude and longitude – these are required fields. Latitude and longitude are needed to place a pin on the map. The map to the right can be used to find the longitude and latitude. It is important to note that if the address is changed after the map coordinates have been selected, it is necessary to re-select the newly entered coordinates in order to change the map location. 6.) Drag and drop a copy of the pre-plan to the upload box
Click the SAVE button.
# Uploading Supporting Documents
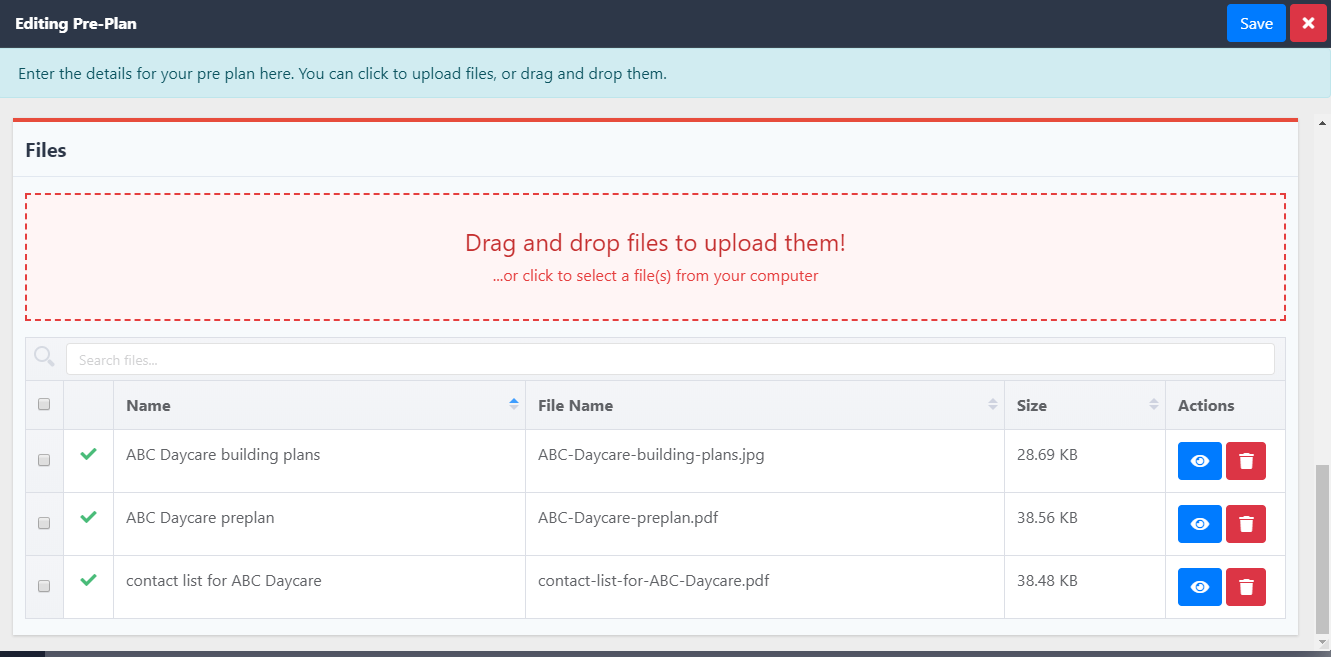
It is possible to upload supporting documents for each pre-plan. These documents could include such things as building blueprints and contact lists.
File Types
PDF files are the preferred file type as most devices can read a PDF file without the need for any additional software.
# Automatically Creating and Selecting the Map Coordinates for a Pre-Plan
To automatically fill in the coordinates for a pre-plan, enter the address of the building in the pre-plan to bring up the map for that location.
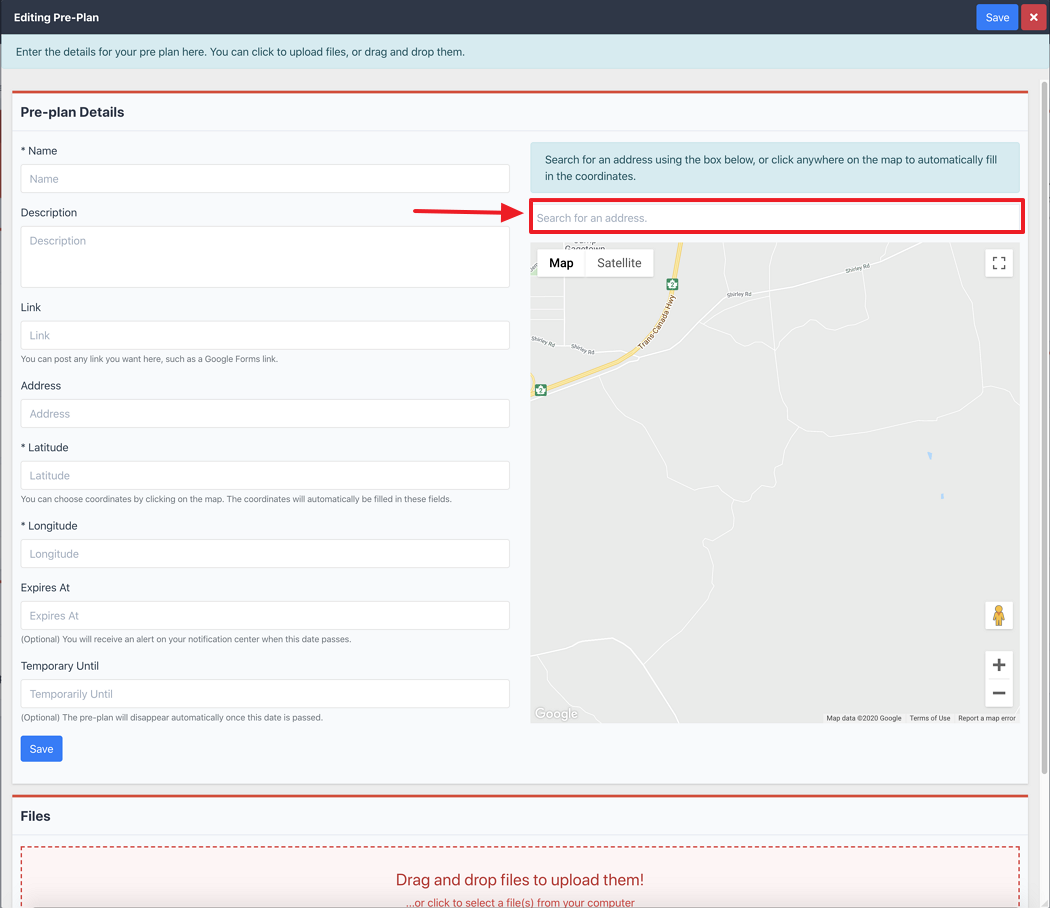
Double-click the location for the incident to automatically fill in the coordinates.
# Editing an Existing Pre-Plan
To edit an existing pre-plan, select the pre-plan that requires editing and click the EDIT button.
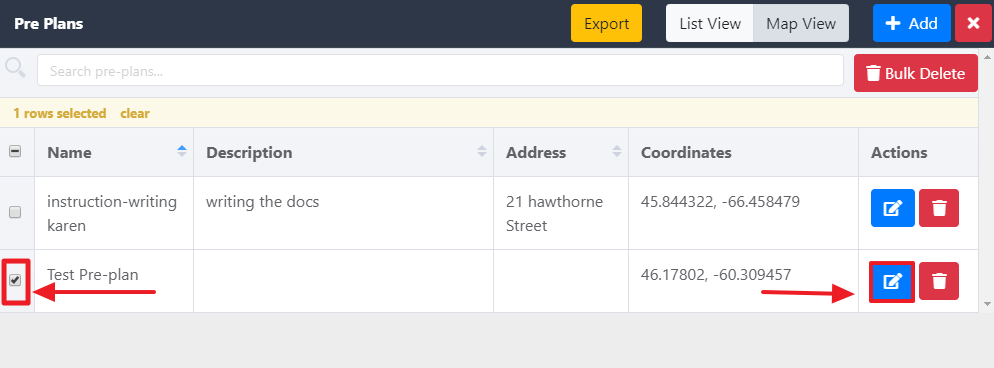
Make the desired changes and click the SAVE button.
# Deleting an Existing Pre-Plan
To delete an existing pre-plan, select the pre-plan that requires editing and click the DELETE button.
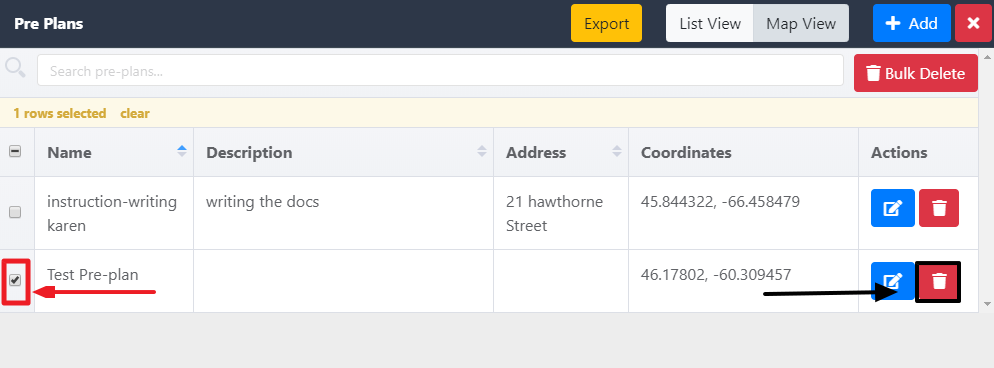
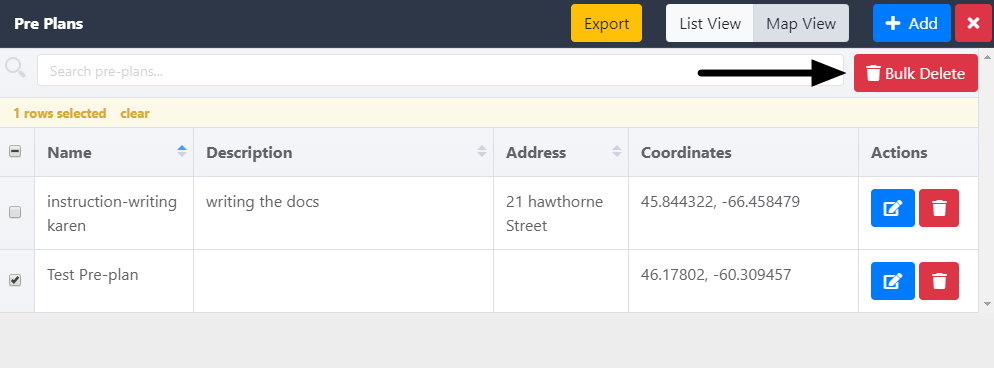
To delete all pre-plans, click the BULK DELETE button.
Reminder
Deleting a pre-plan deletes all supporting documents associated with that pre-plan.
# Changing the View of Pre-Plans
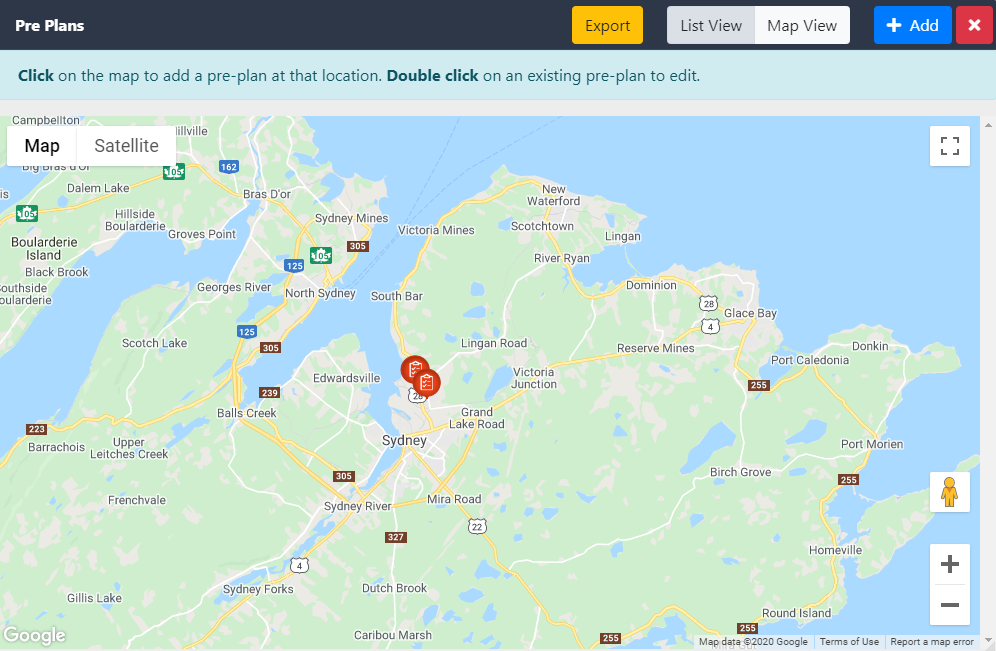
The pre-plans within the FireQ can be viewed as a list or on a map. Use the LIST VIEW button and the MAP VIEW button to toggle back and forth between the views.
The list view is the default setting.
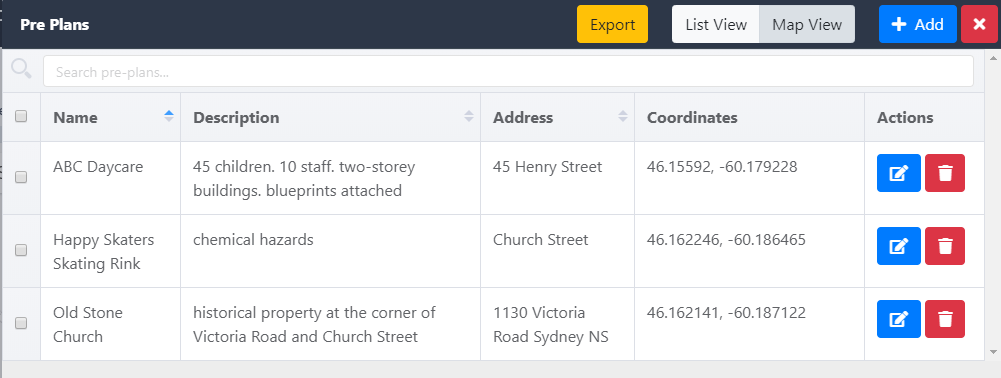
The map view looks like this.
# Printing and Exporting Pre-Plans
To export a list of the pre-plans within FireQ, click the EXPORT button.
Select the desired file type for the export and click the EXPORT button.
# Incident Pre-Plans – on the FireQ App
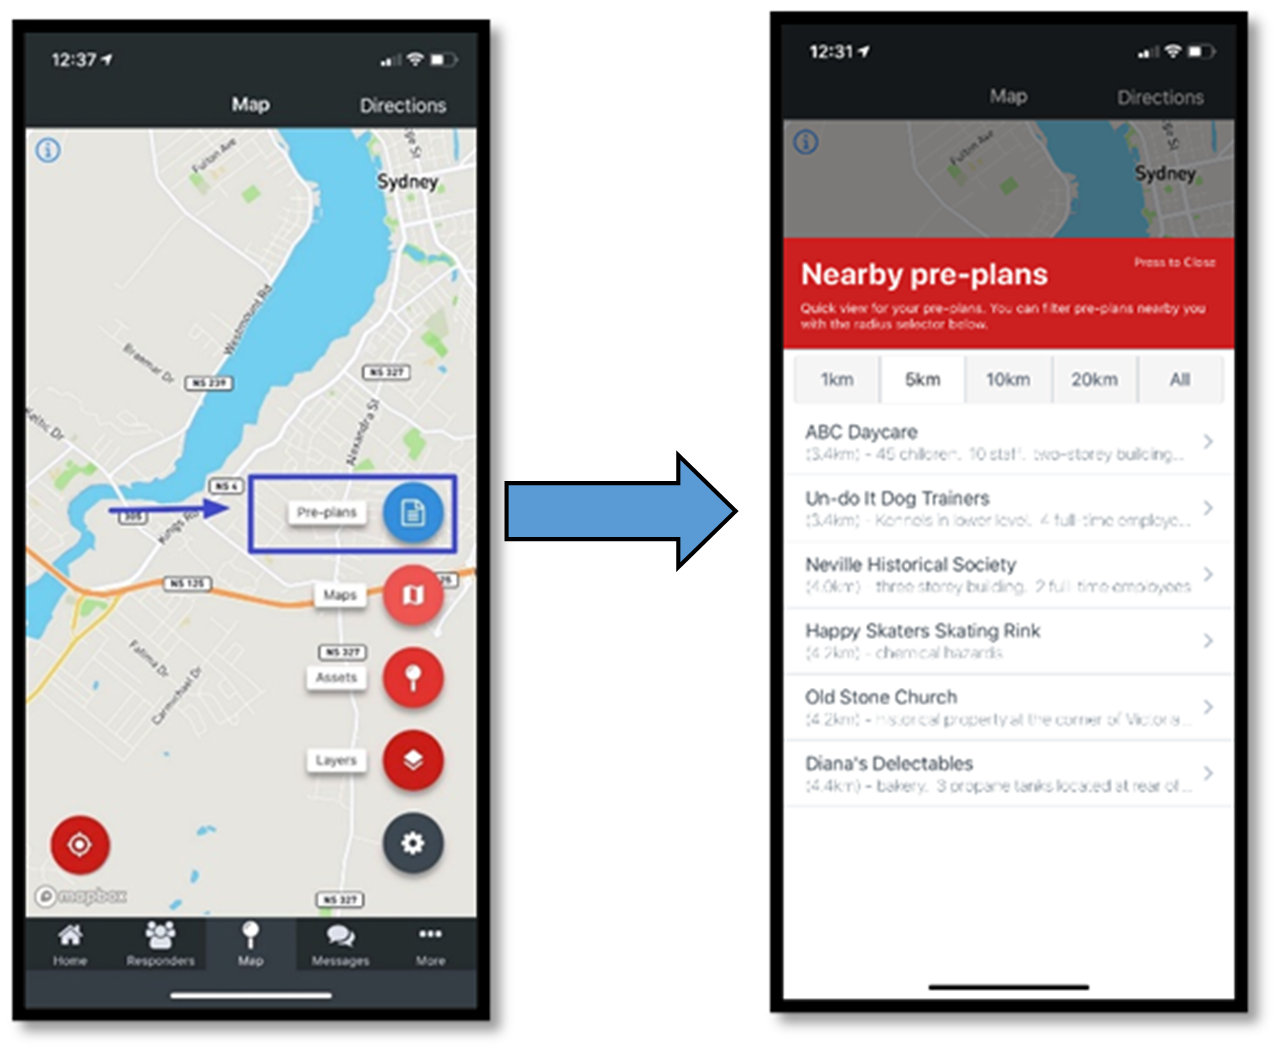
During active incidents, pre-plans that have been added to the FireQ system are visible to firefighters on the incident map in the FireQ app. To see pre-plans, tap the PRE-PLANS NEARBY button.
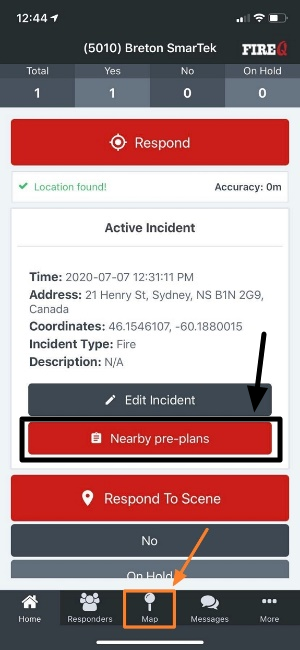
To see existing pre-plans within a specific radius of an active incident, tap the MAP button to make the map appear.
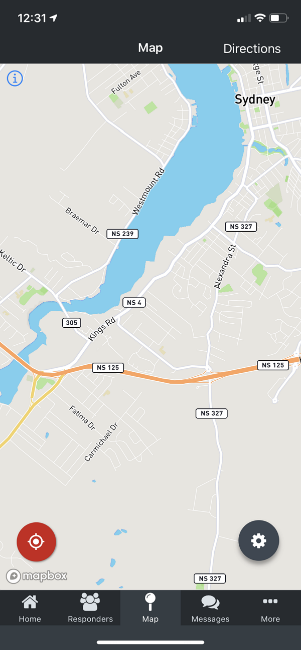
Tap the SETTINGS button to see a list of the available map layers.
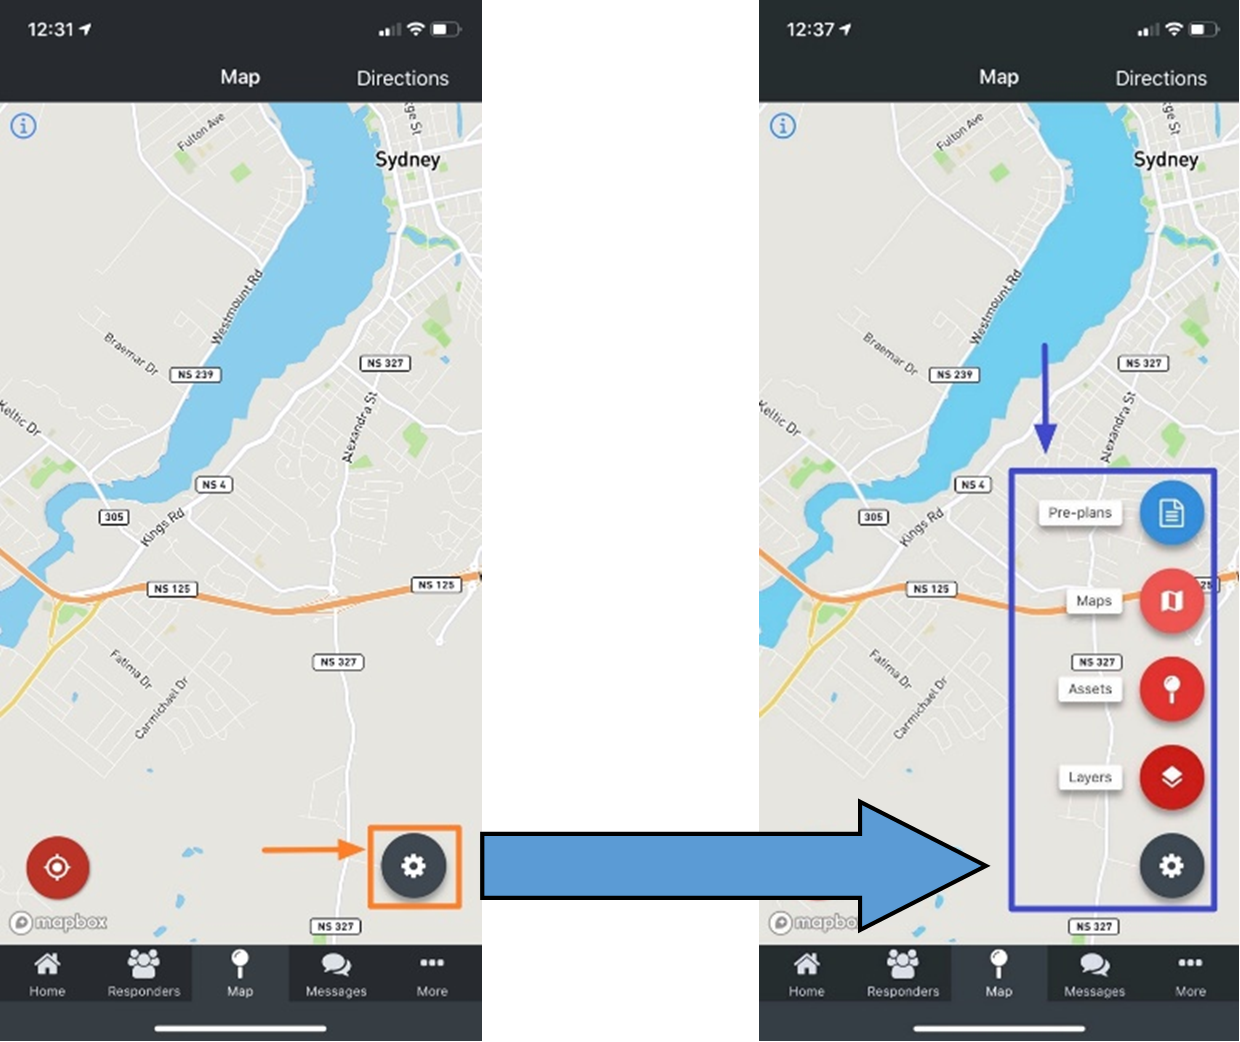
Tap the pre-plan button to see a list of the available pre-plans.
Reminder
Pre-plans can be filtered by radius to the incident. Tap the desired selection to filter the results.
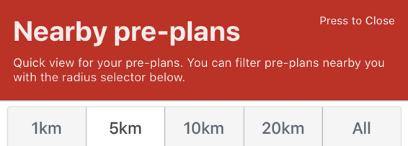
Select the desired pre-plan and tap to view.
